Copper (Br) Vapour Laser
Photos
![]() |
View 1
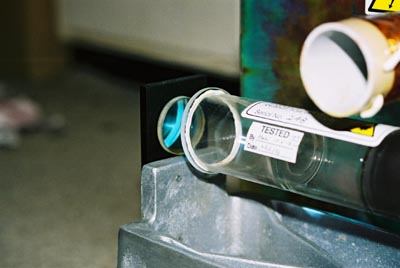
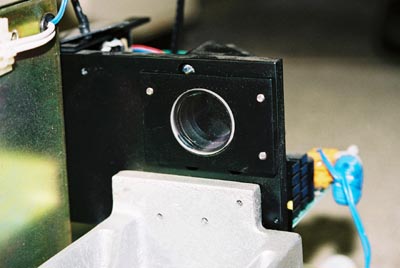
Output window. This window is a simple quartz output with reflection of around 4% only. Having a high-quality reflector (which would reflect more light back into the tube) would actually decrease the power output and kill lasing altogether - this due to the very short time the atoms are in the excited state and also due to the large amount of photonic emission. |
| View 2
Laser Tube and Total Reflector. I have had this laser still produce an output with this reflector blocked, and have also have the laser laser straight off my hand. This is only possible due to the very high gain of the laser. Copper Vapour lasers can lase superadiently (don't require a predefined resonant cavity). |
![]() |
![]() |
View 3
This view showing the laser tube. This tube design consists of three vessels with look much like the bottom end of test tubes joined onto the main tube. Each of the vessels contain a portion of Copper Bromide crystal. Each of the vessels is then placed in a small heater pot. Each pot is a heater element with a themocoupler to provide feedback for accurate temperature control. Each of the heating elements is carefully controlled to provide even depletion of the Copper Bromide crystal. The white insulation is actually alumina. Alumina is the refined product of bauxite, which is then used to make aluminium. |
| View 4
On Start-up, the laser tube is heated (in this case the three small vessels containing the Copper Bromide crystal). This process takes around 10min. After this period, the high-voltage power supply is started and the tube is energised. The characteristic red neon glow in the photo is the result of the presents of Neon, used as a buffer gas in the laser tube. This transition period is used to further heat the tube (using a gas discharge) to generate the required Copper Vapour pressure for the lasing process. |
![]() |
©
Copyright 1998-2003 NightLase Technologies All rights reserved.
Reproduction in whole or part without permission is strictly prohibited.