Journey In Coffee Roasting
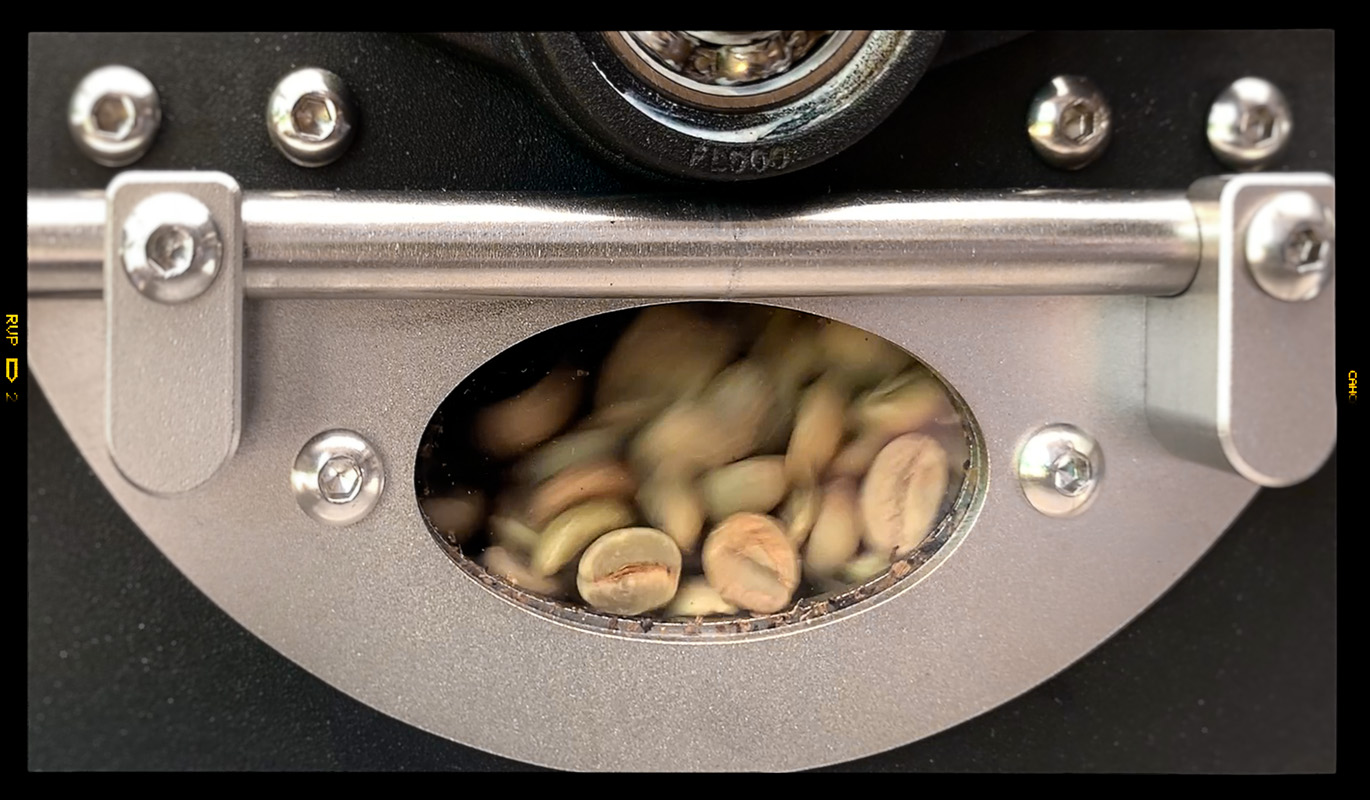
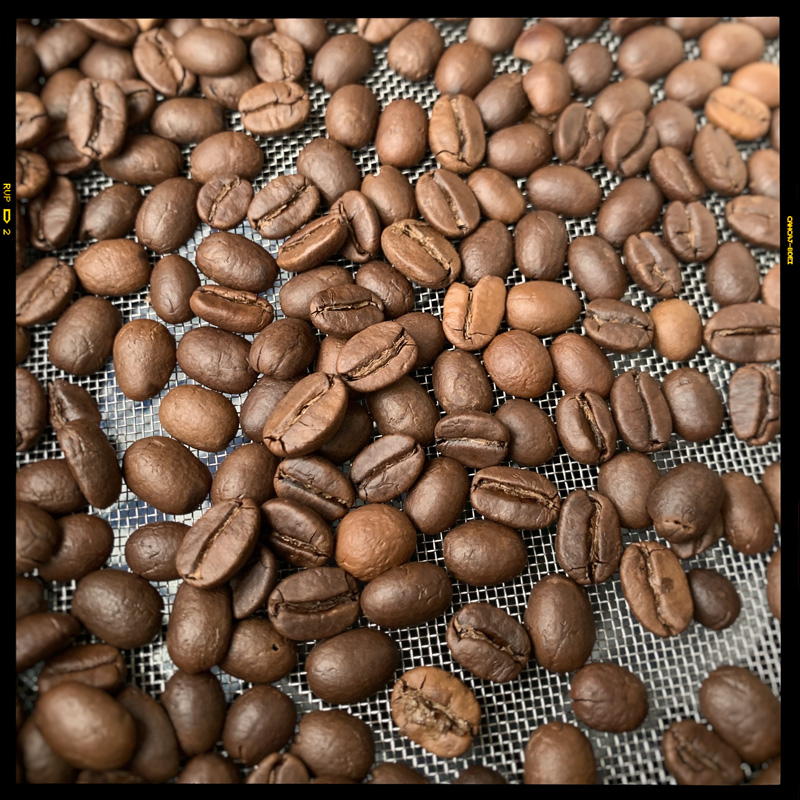
I began my coffee roasting journey by experimenting with small batches, utilising both the 'Gene Café' and 'iRoast' machines. While these devices offered full program and semi-automatic settings, I soon realised that the lack of finer manual control was limiting, much like in photography, where a lack of manual adjustments can restrict creativity and precision.
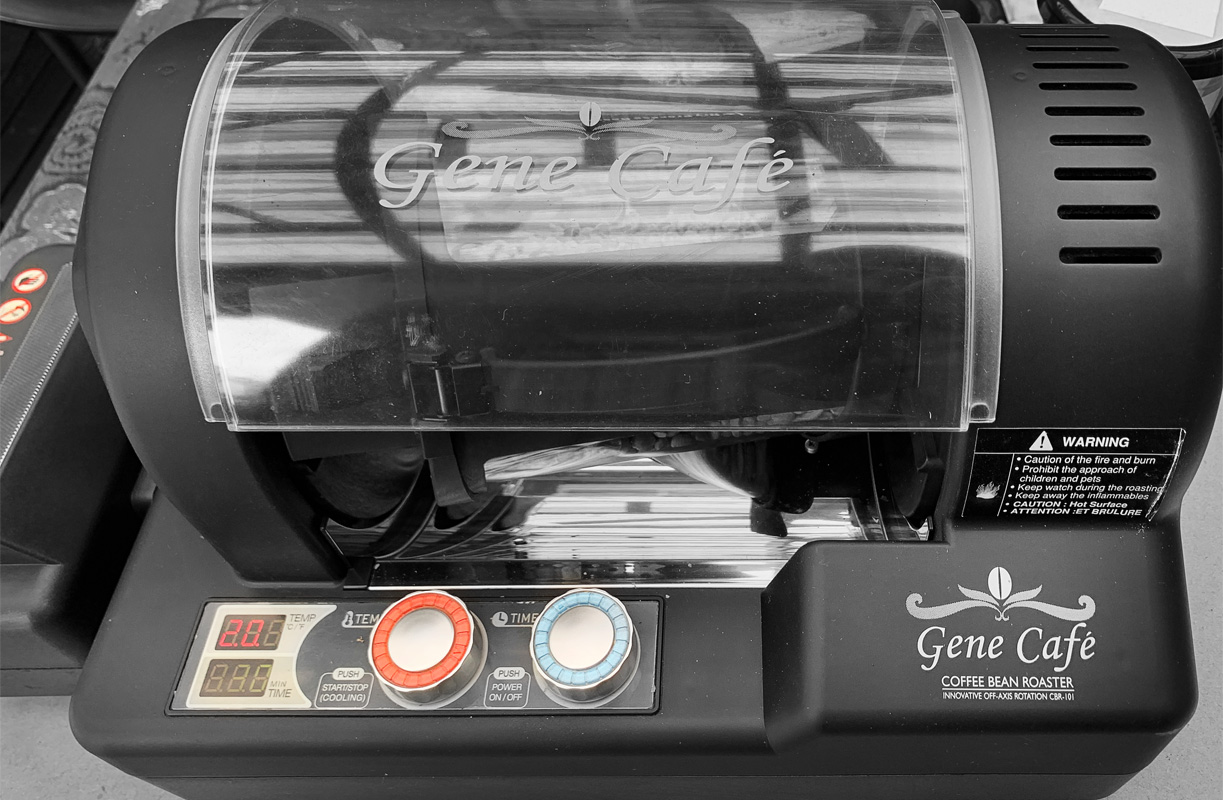
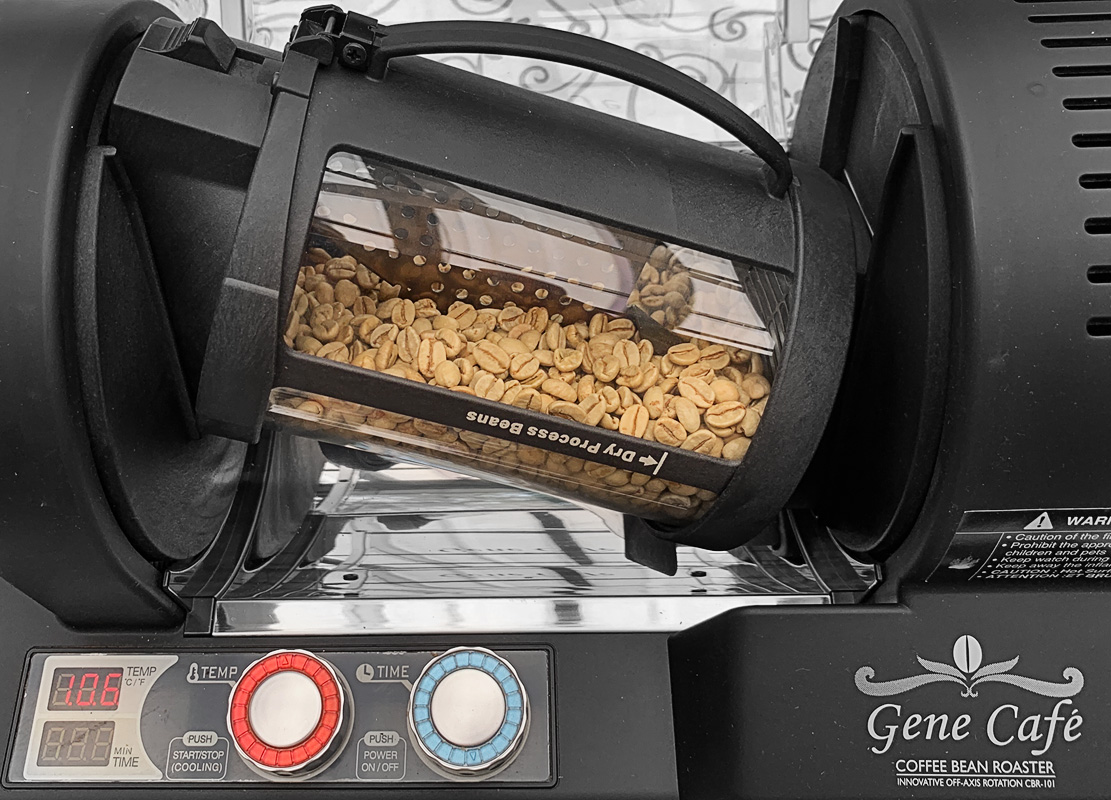
The desire to elevate my roasting skills was sparked in early 2024, when Dean and Rose Kiner announced their intention to sell their business and retire. This pivotal moment presented a unique opportunity. Motivated by the high standards set within the business and eager to develop my own expertise, I immersed myself in the hands-on process of learning to roast. My goal was to achieve the desired roast profiles through continuous learning and practical experience, a pursuit that remains ongoing to this day.
In early May 2024, I discovered a sale featuring sample coffee roasters with capacities up to one or two kilograms. My search led me to Schibello Coffee Roasters, where I met Alex, who was listing several different roasters for sale. Initially, I considered purchasing a Probat RE1. However, after Alex introduced me to a compact, 100g gas-fired drum roaster, the 100N model manufactured by Feima in Taiwan, I was intrigued by its compact size, capabilities and ability to replicate a roast profile of a more traditional larger sized drum roaster. After a demonstration of the roaster, I made the decision to purchase it and collected on 3rd June 2024, marking a significant step forward in my coffee roasting journey.
Once I brought the mini roaster home, my curiosity led me to investigate its origins in greater detail. I began searching for available replacement parts and exploring various options for overhauling the roaster, with a focus on making improvements and modifications. The primary objectives during this process were to ensure the safety and reliability of the unit, as well as to bring it into compliance with relevant standards. A significant aspect of this was converting the roaster to run directly off 240V AC power, thereby eliminating the need for a small, voltage step-down transformer to 115V.
During my research, I discovered two other companies that appeared to have manufactured very similar roaster designs. Notably, a unit produced in Indonesia by Suji Coffee stood out for its unique and appealing additions. Although these units all shared a similar appearance, each incorporated distinct features and differences. This prompted me to reach out to the individual manufacturers via email in an effort to source the necessary parts for my upgrade and if indeed some compatability issues to face.
The process of upgrading the roaster quickly evolved into a mini-project of its own. I developed a list of planned upgrades focusing on four main areas:
- Electrical: Replacing the existing motor and main airflow fan with 240V versions to ensure compatibility and reliability.
- Gas Control: Upgrading the gas control system to allow for safe and proper connection to a gas bottle, incorporating a precise needle control and a pressure gauge for improved safety and accuracy.
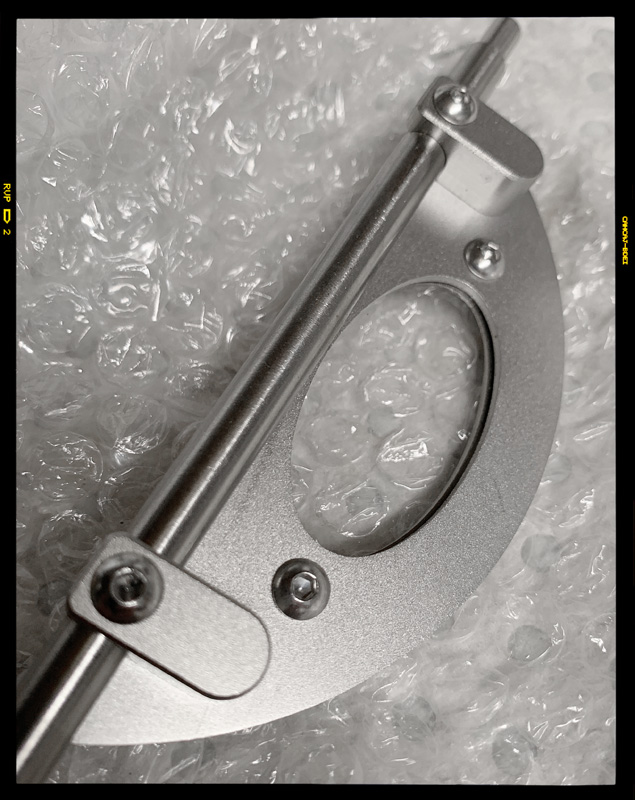
- Bean Release Door: Installing a new design with viewing window in the bean release door, enhancing both functionality and user experience.
- Overall Aesthetics: Making improvements to the general appearance of the roaster.
In addition to these major upgrades, I dedicated extra time to dismantling the roaster on several occasions. This hands-on approach allowed me to better understand the intricacies and small challenges inherent in the design, ultimately informing each step of the upgrade process.
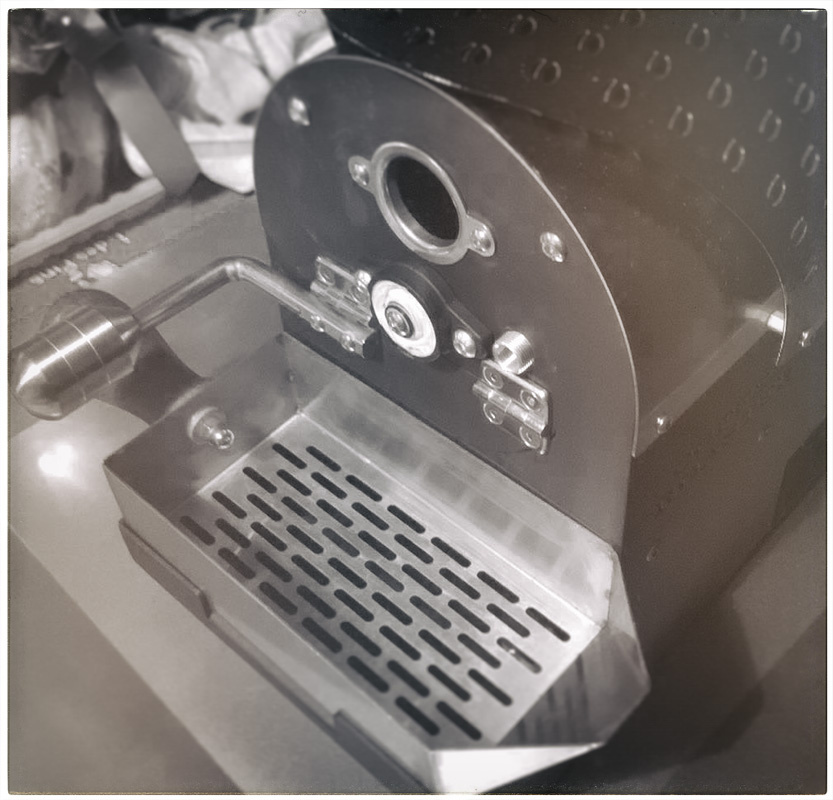
The complete teardown of the roaster began on 3rd June 2024. This process involved removing the external covers, taking out the gas burner, and conducting an inspection of the electrical components. Each step was carried out methodically to ensure all parts were thoroughly checked and assessed for wear or non-compliance with current standards.
During the inspection, it was noted that the existing burner featured a barbed fitting and utilised an outdated POL-equipped regulator. Both components were identified as not meeting current safety standards, prompting the need for replacement. However, sourcing and fitting suitable new components proved to be a more complex task than initially anticipated.
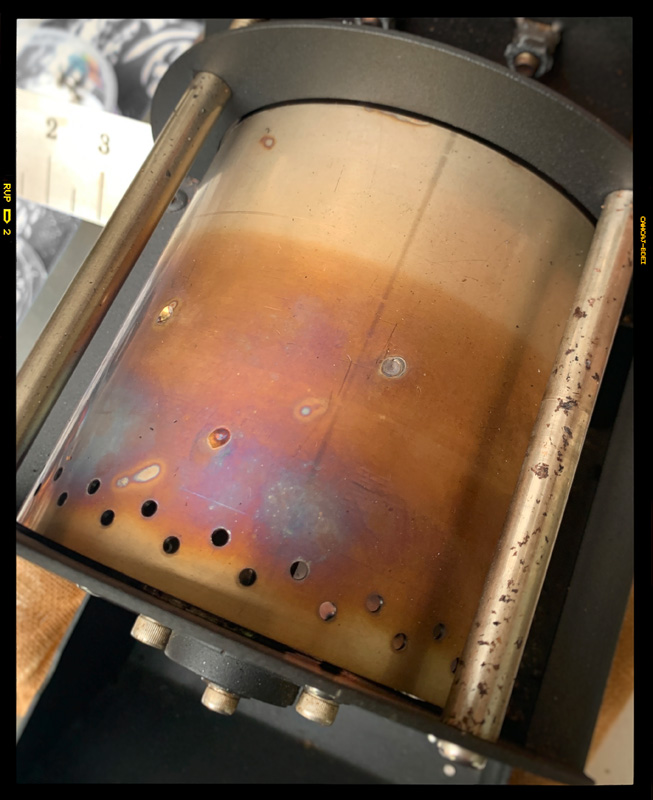
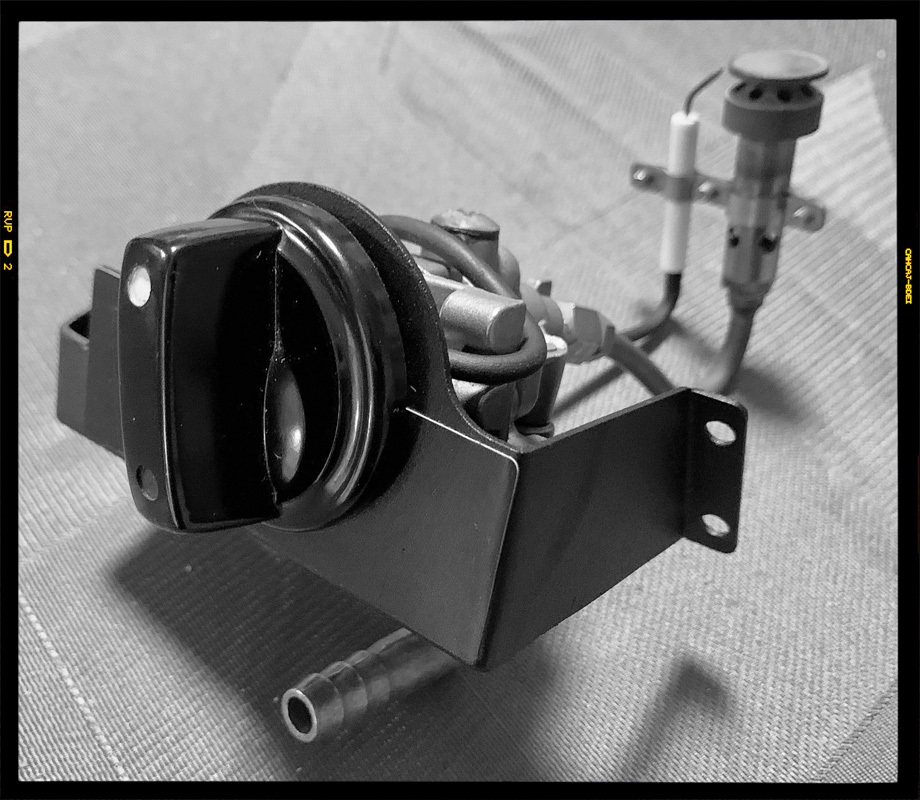
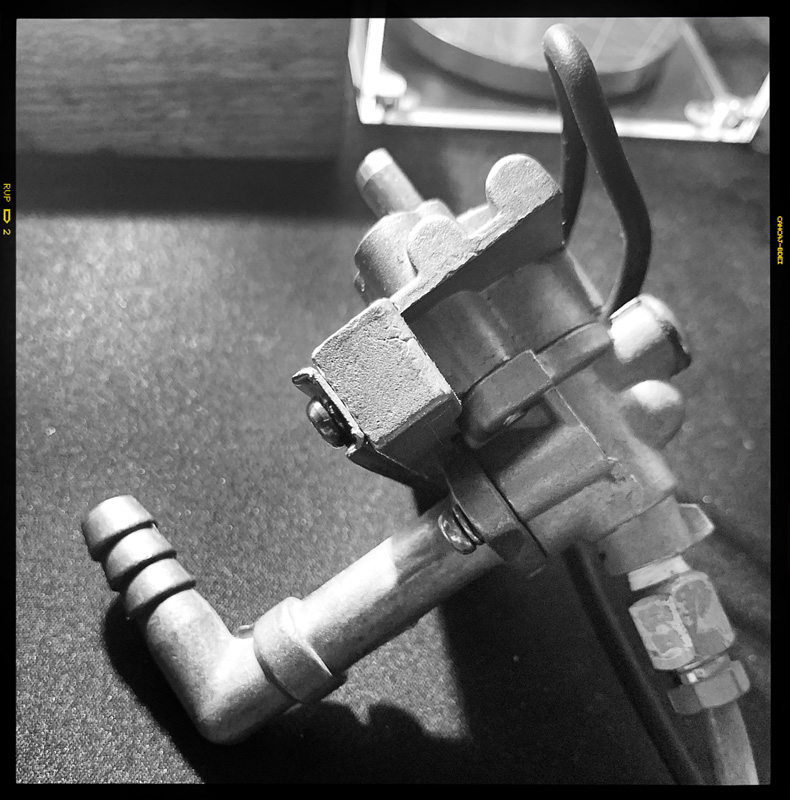
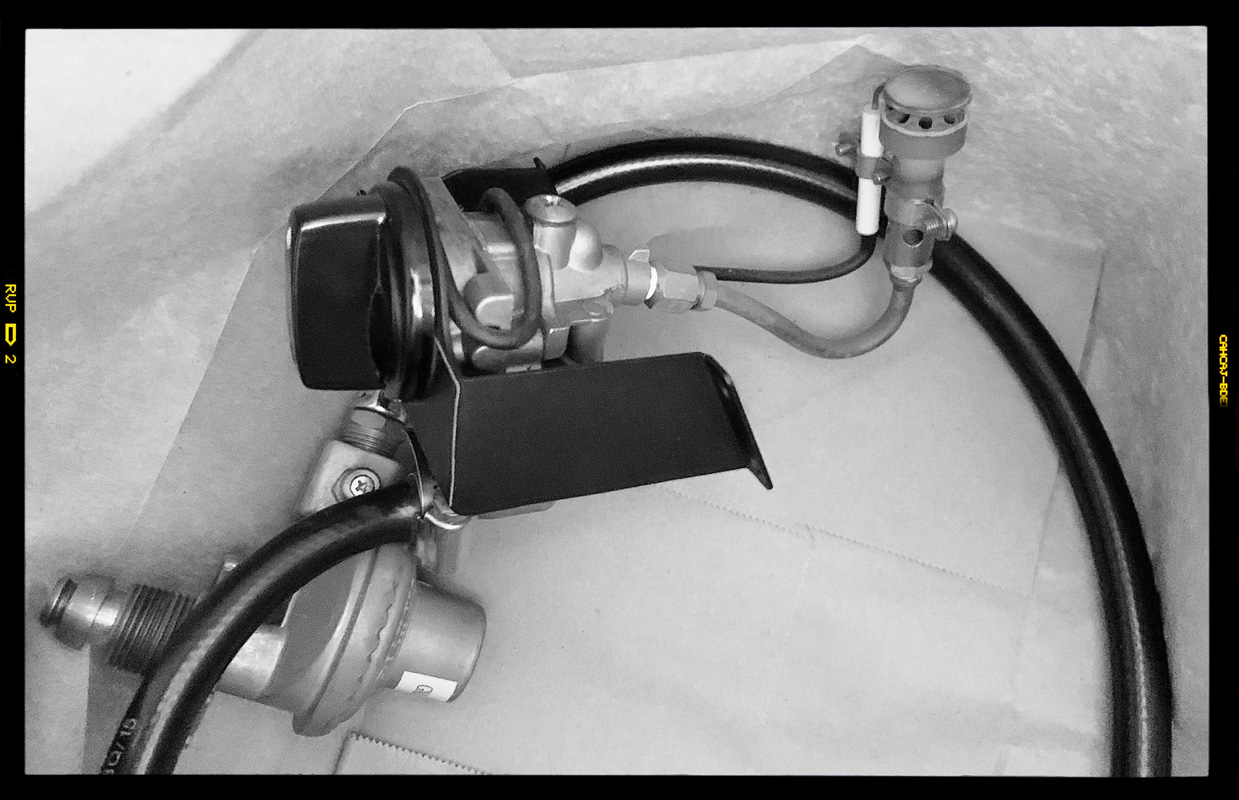
To facilitate ongoing testing, an interim solution was implemented. The regulator was replaced with a modern LCC27 unit, which incorporates a gas safety apparatus. Additionally, a new hose was fitted to the main gas control inlet barb using a double ring-clamp method, ensuring a secure and safe temporary connection while further upgrades were considered.
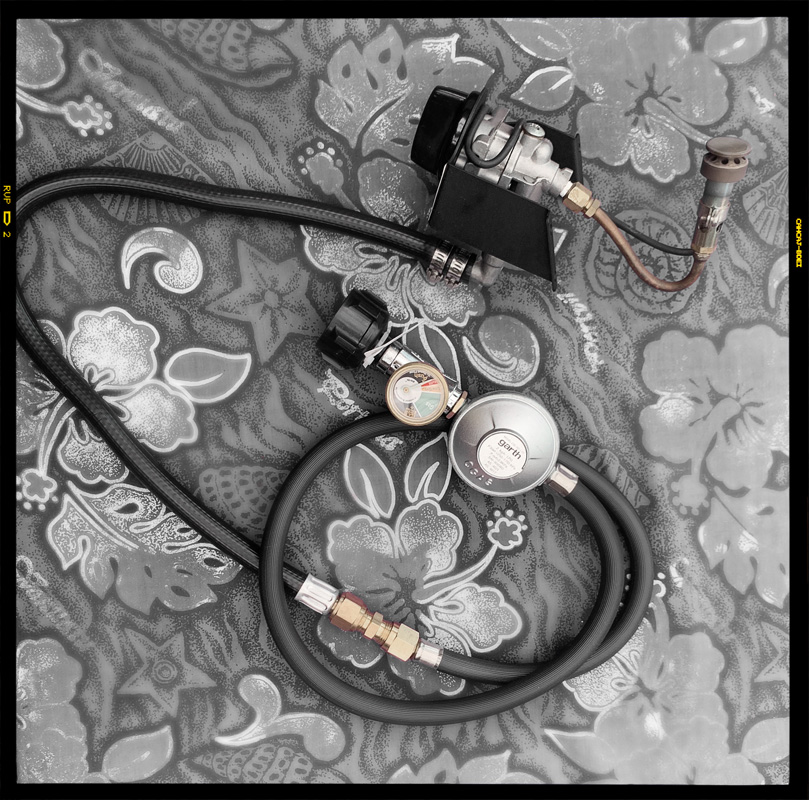
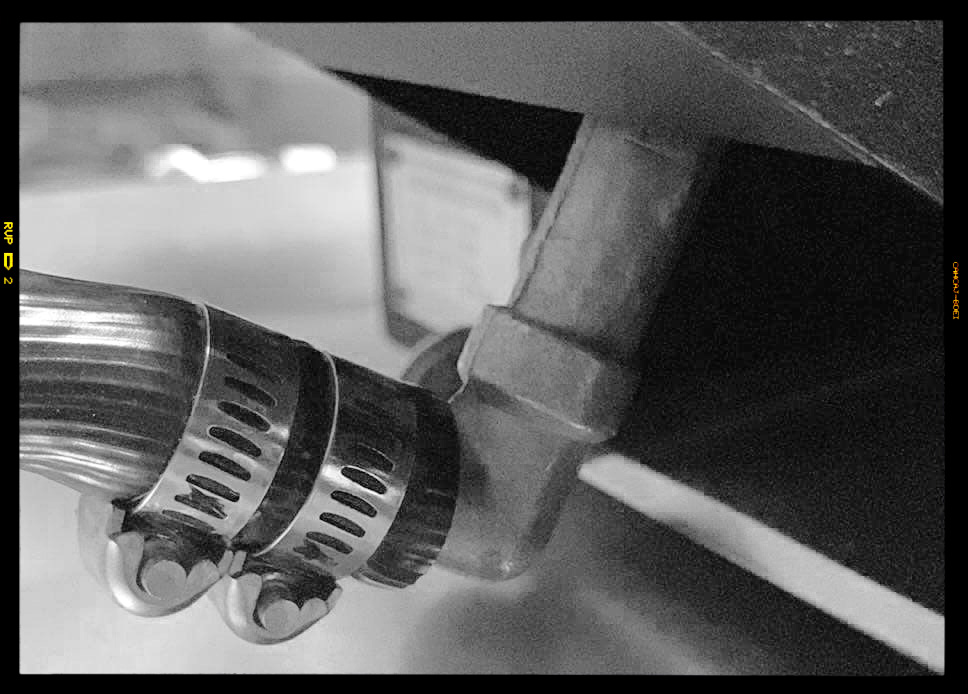
Double-Ring Clamp Method
With the roaster reduced to its bare chassis, I began by gathering all of the screws previously in use. I compiled a detailed list, noting the thread sizes and lengths for each fastener. This exercise was part of a minor aesthetic enhancement, which involved replacing all existing cap screws with stainless steel hex button head screws. In total, approximately fourty screws were upgraded to improve both appearance and durability.
During this process, I also took the opportunity to reinforce several areas that required attention while access to the chassis was available. Specifically, I straightened the bent cooling vent cover rod, ensuring it was properly aligned. Other minor components and sections needing adjustment were also addressed to strengthen the overall structure and maintain optimal function.
The next phase of work involved a thorough investigation of the electrical components, focusing on identifying options to upgrade them for direct 240VAC operation. The existing electrical components included the drum motor and the main airflow fan. The drum motor is a synchronous geared motor, designed to operate at the line frequency of the AC supply. In Australia, where the mains frequency is 50Hz, this results in the drum rotating at 50 RPM. The design of these motors incorporates an additional capacitor, which is used to select the direction in which the motor operates.
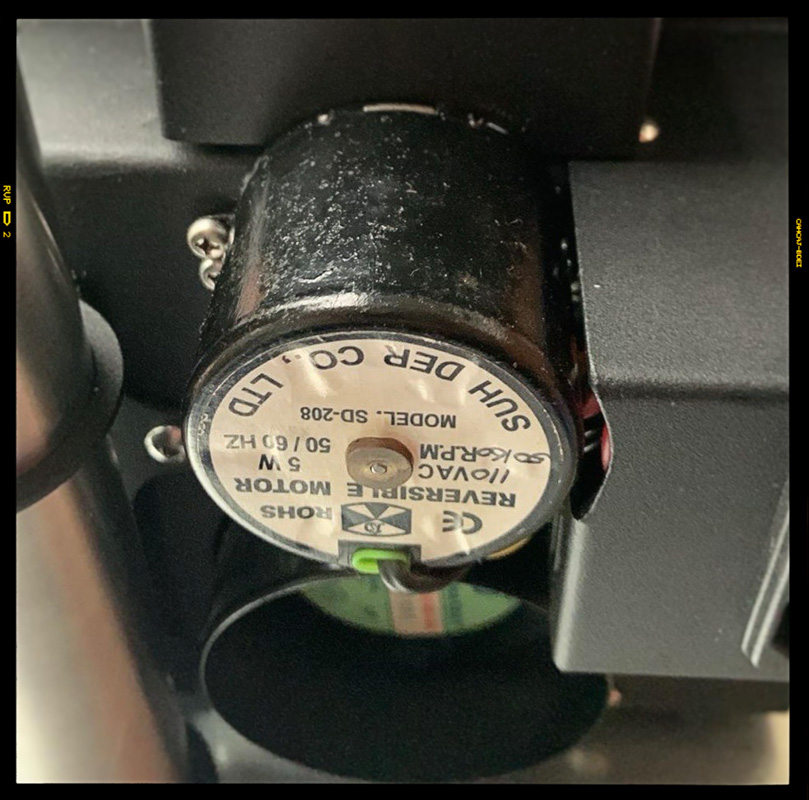
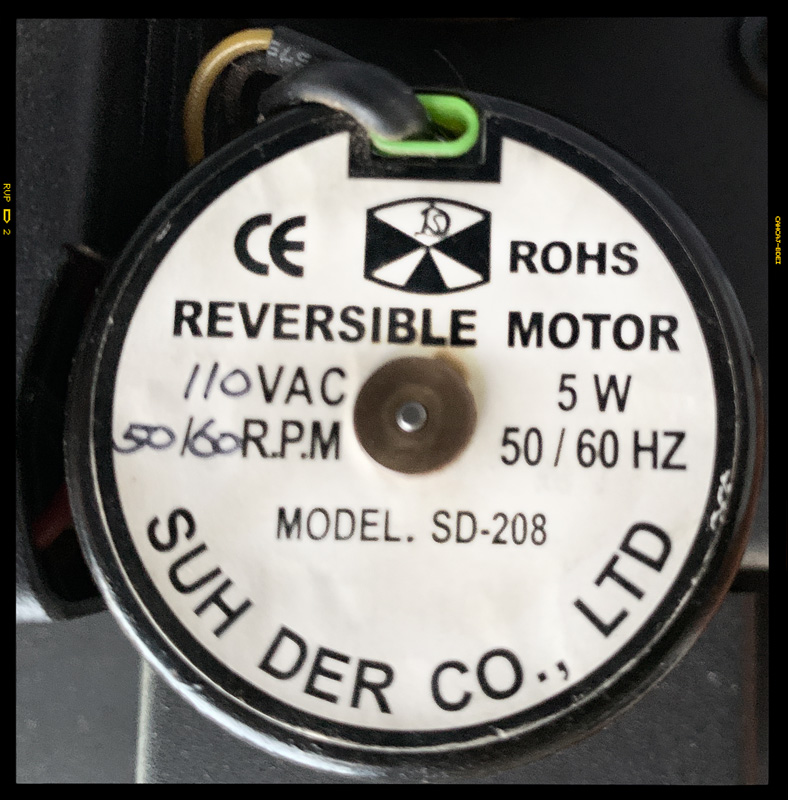
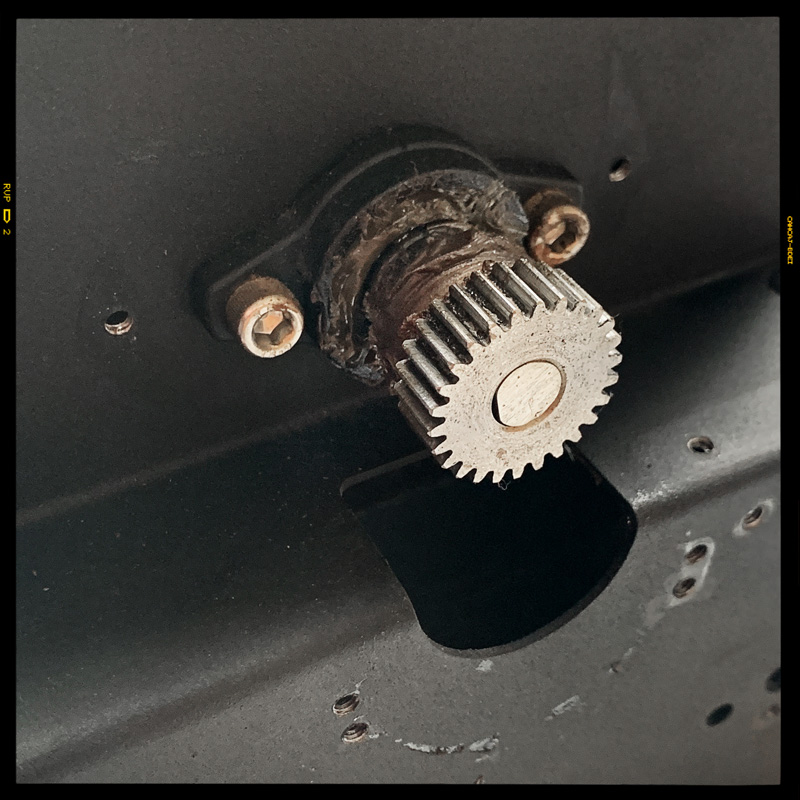
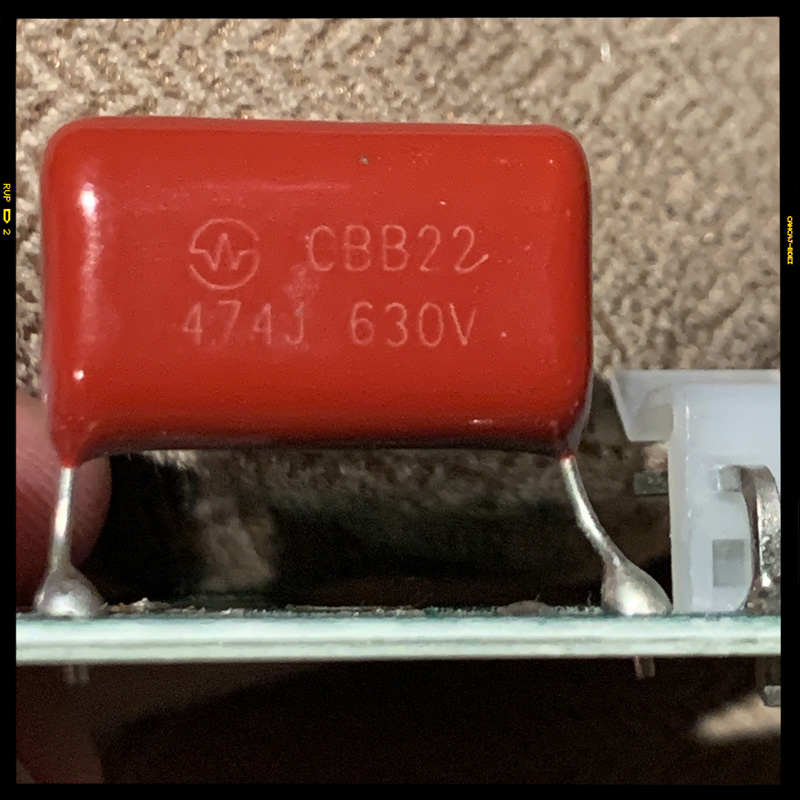
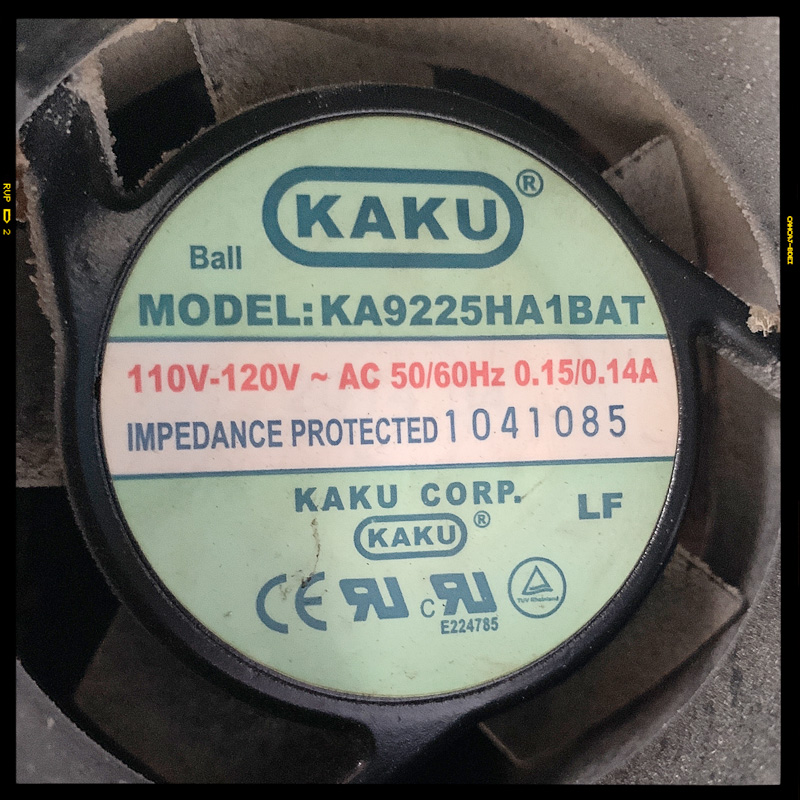
Upon inspecting the electrical box, it became apparent that the internal wiring was quite disorganised. This unsatisfactory setup was promptly added to the list of items requiring remediation to ensure safety and reliability.
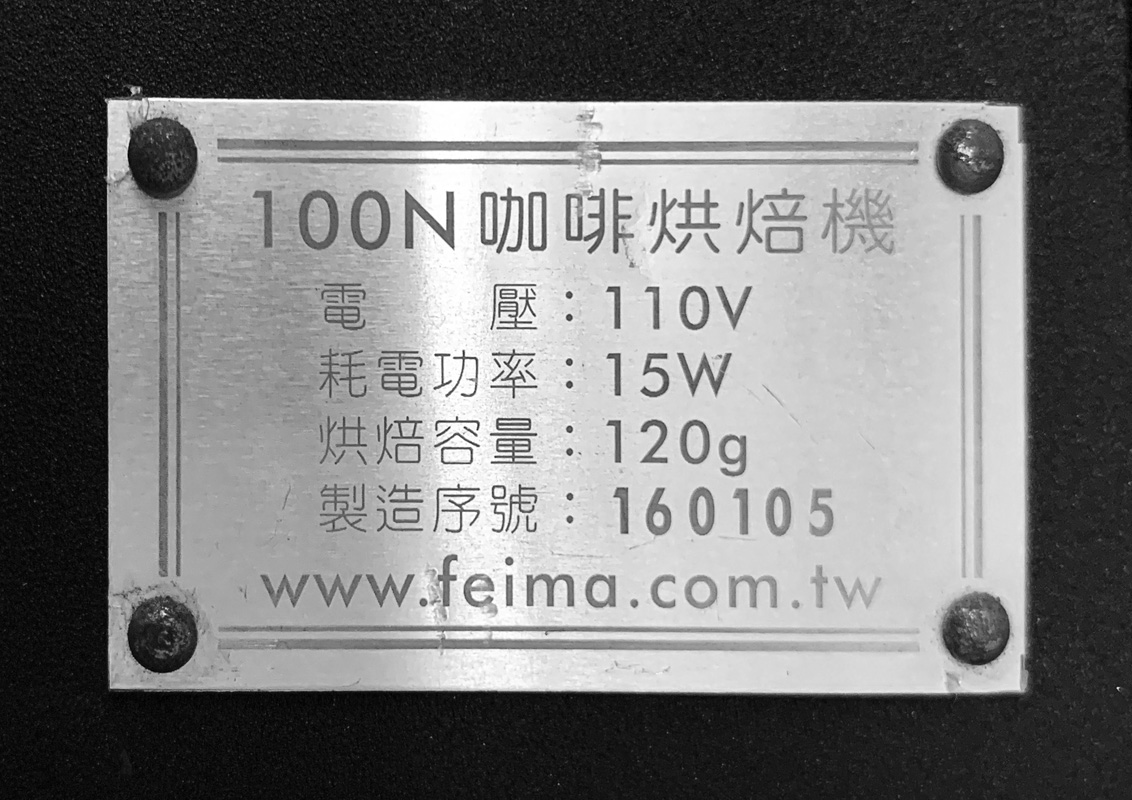
Further research was undertaken into the original manufacturer, Feima in Taiwan, based on information found on the unit's nameplate. During this investigative phase, it was discovered that the 100N coffee roaster is produced by the parent company and OEM, Yang-Chia Machine Works. Notably, a Version 2 of this unit exists, featuring several upgrades including a direct-drive drum motor, a viewing window, enhanced cooling, and a thermocouple probe. The addition of a viewing window was identified as a particularly valuable improvement, as it allows visual monitoring of the roasting process.
This research led to the discovery of a 200g (200N) capacity unit by the same OEM, which included improved cooling trays. During this process, images surfaced showing subtle differences in the 100N platform, revealing another manufacturer: Yoshan Roasters, a Chinese-based company. The investigation also uncovered a further 100N variant manufactured in Indonesia, distinguished by a refined and polished appearance, including improved finish of the door's metal surface, making it a significantly more impressive unit overall.
The next stage involved contacting the various manufacturers in an effort to source upgrade parts, a process that presented its own set of challenges and frustrations. The initial approach to the OEM did not yield any results, as they were unable to supply upgrade parts. Consequently, attention shifted to the next possible supplier.
After reaching out to Yoshan, communication gradually commenced, and it was eventually confirmed that they could supply the required parts. The focus then shifted to clarifying exactly which parts were needed. After some back-and-forth, a list of parts was finalised with Yoshan. By 3rd July 2024, the main upgrade components, including an improved door and various ancillary items, were dispatched to Australia.
While waiting for the parts to arrive from Yoshan, communication with another supplier, Suji, was progressing well. Notably, Suji's offerings featured refined finishing and superior overall quality of parts, an impression that became clearer as discussions continued and further order of parts in the pipeline.
The awaited parts from Yoshan arrived on 8th July 2024, marking a significant milestone in the ongoing upgrade and refinement of the coffee roaster.
The process that was undertaken to adapt and install the new door design, commenced on 10th July 2024. The structural and mechanical changes required to accommodate the new door are detailed below.
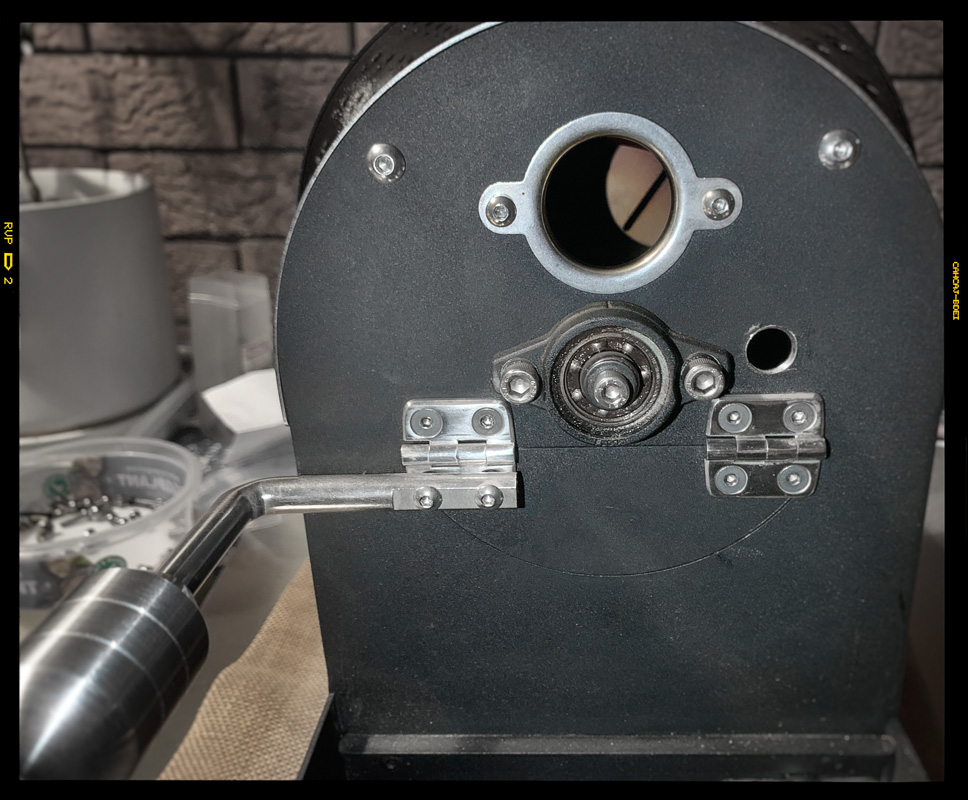
The original door was installed using two hinges, providing a straightforward attachment to the framework. In addition to the hinges, the door counterweight system was incorporated into the design being mounted to the main 'L' shaped rod (on short side) and which itself (the long side) was attached to the left-hand lower hinge. The mechanical setup of the new door is completely different, requiring some work to ensure correct alignment and smooth operation when the new door was installed.
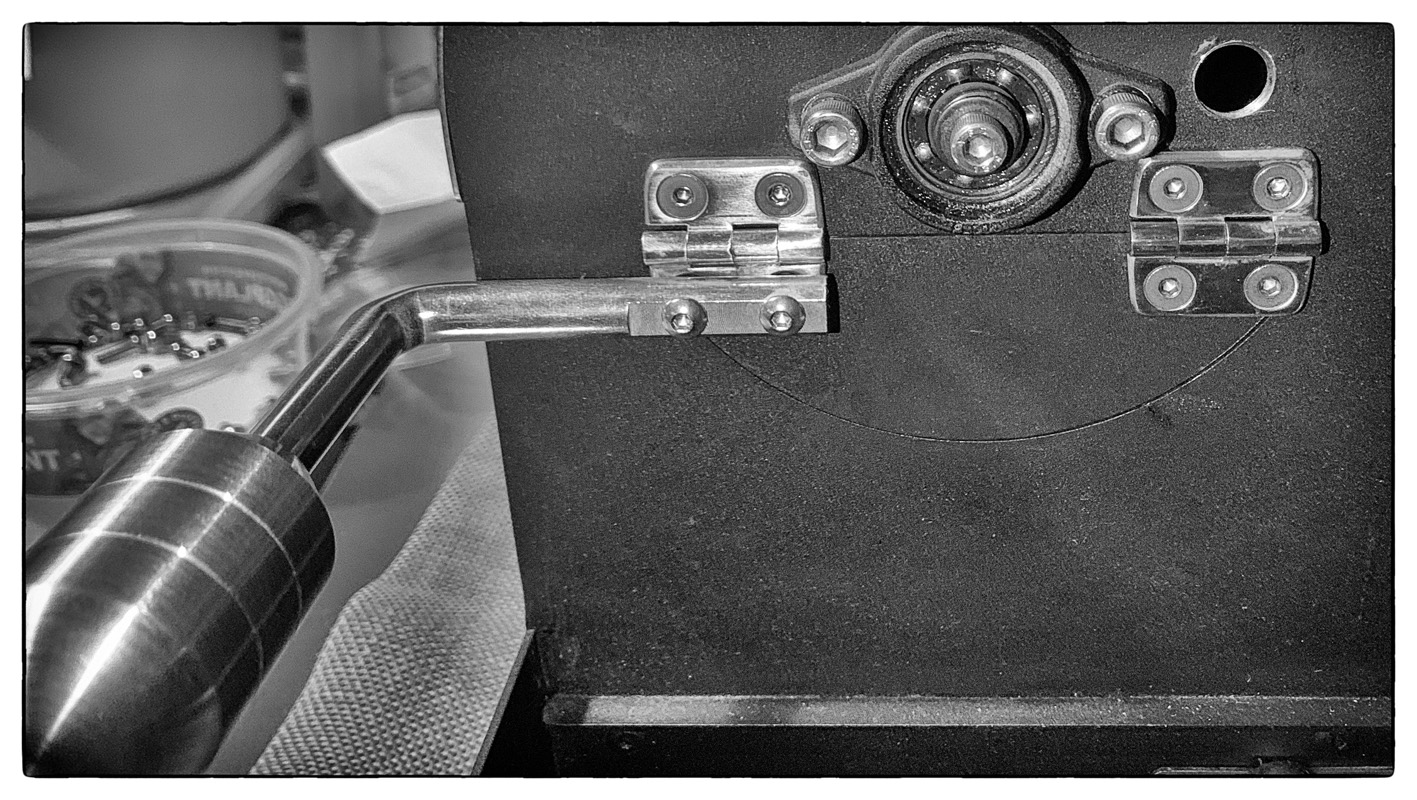
OEM Door Setup
This phase of the project centred around a comprehensive assessment of the correct positioning and alignment of the two main outer fixed bearings. This step was essential to ensure proper and smooth operation of the door when operated, and that there would be no interference between the door, opening of the frame and also the rotating drum itself. The left bearing is distinguished by a 'U' shape cutout which is designed to engage precisely with a machined slot in the horizontal section of the main supporting rod (which is also an axel). Once correctly positioned, the bearing is secured using two screws to the framework. The right-hand bearing is slightly different, characterised by a drilled hole that accepts the end of the horizontal rod and is also attached to the framework. The installation of this part of the door assembly required the drilling and tapping of four new holes into the framework
Following the installation of the outer fixed bearings, a pair of inner 'clamp' components are attached to the rotating horizontal rod. The final step in the process involves the installation of the door itself, completing the assembly.
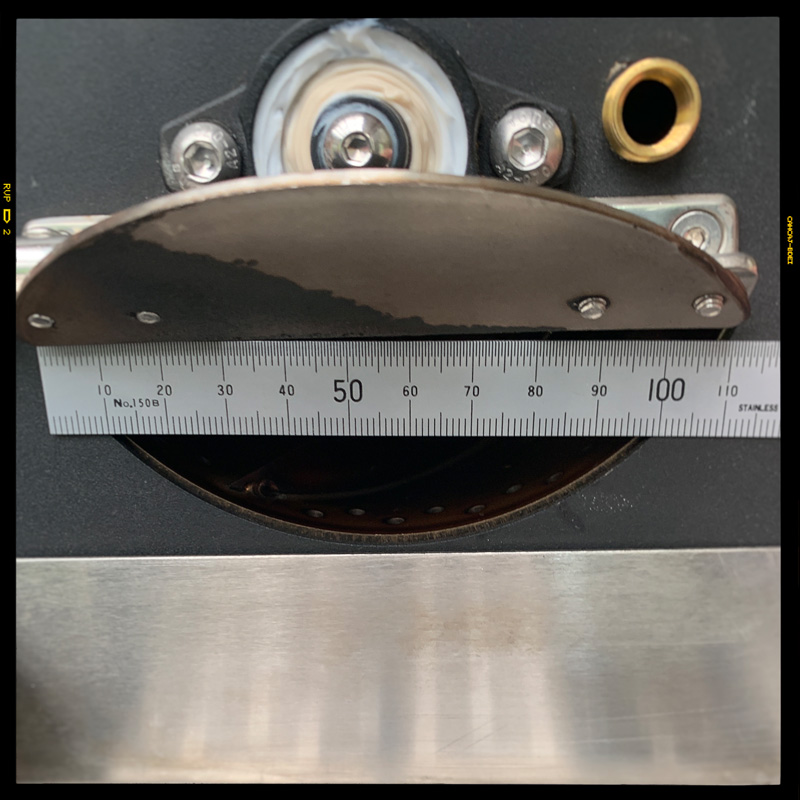
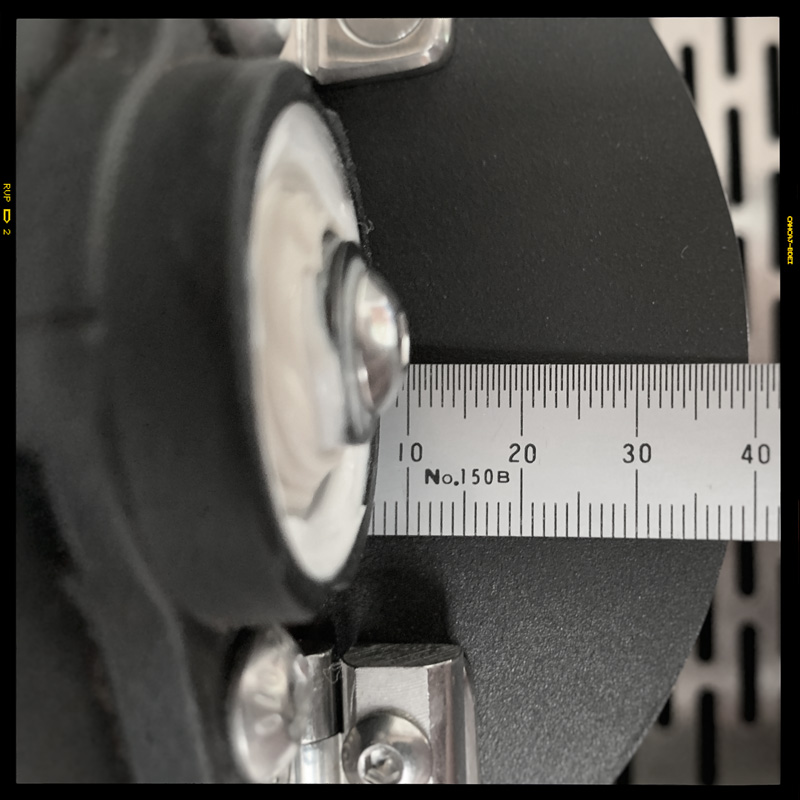
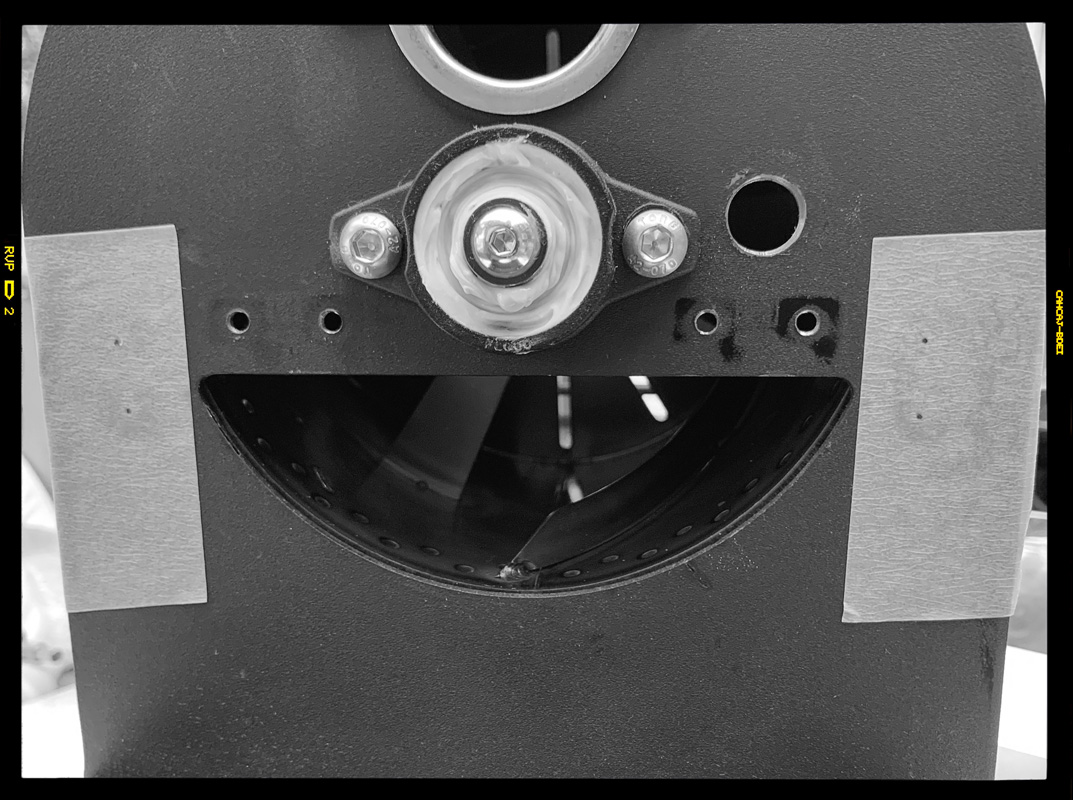
The first task required accurately marking the mounting points for the outer braces, with particular attention given to alignment. This step proved to be a significant challenge, as the parts supplied by Yoshan arrived both unfinished and inaccurately machined. The overall finish and quality of the machining were questionable, resulting in a less than satisfactory impression and adding to a growing list of challenges that needed to be resolved to ensure smooth door operation.
Another concern was the glass provided for the door, which felt unusually firm. This later became problematic, as stress cracks began to appear. Several key points required attention: the corners of the half-moon door needed to be rounded to resolve an interference issue; the edges of the metal components needed sanding and smoothing; and the holes in the four mounts had to be enlarged to provide some flexibility. Additionally, a machining fault was discovered in the horizontal bar, where two tapped holes were misaligned, causing a twist when the door was mounted. This further exacerbated frustrations regarding poor quality control.
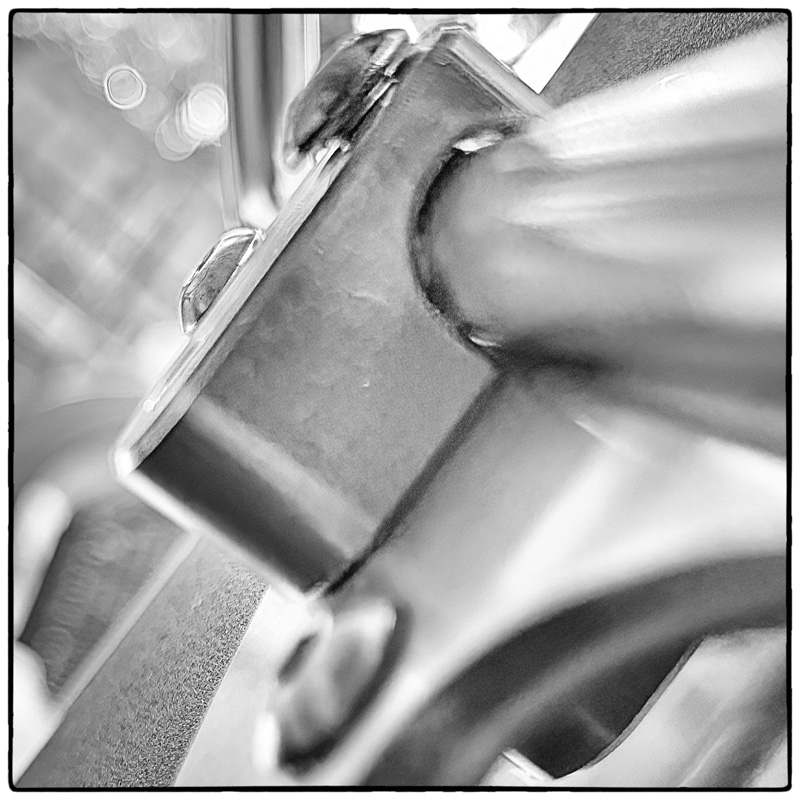
Mounting Challenges
After working through a range of issues and making all the necessary adjustments, I was finally able to get the new door operating smoothly. This achievement, however, did not come without its own set of ongoing challenges.
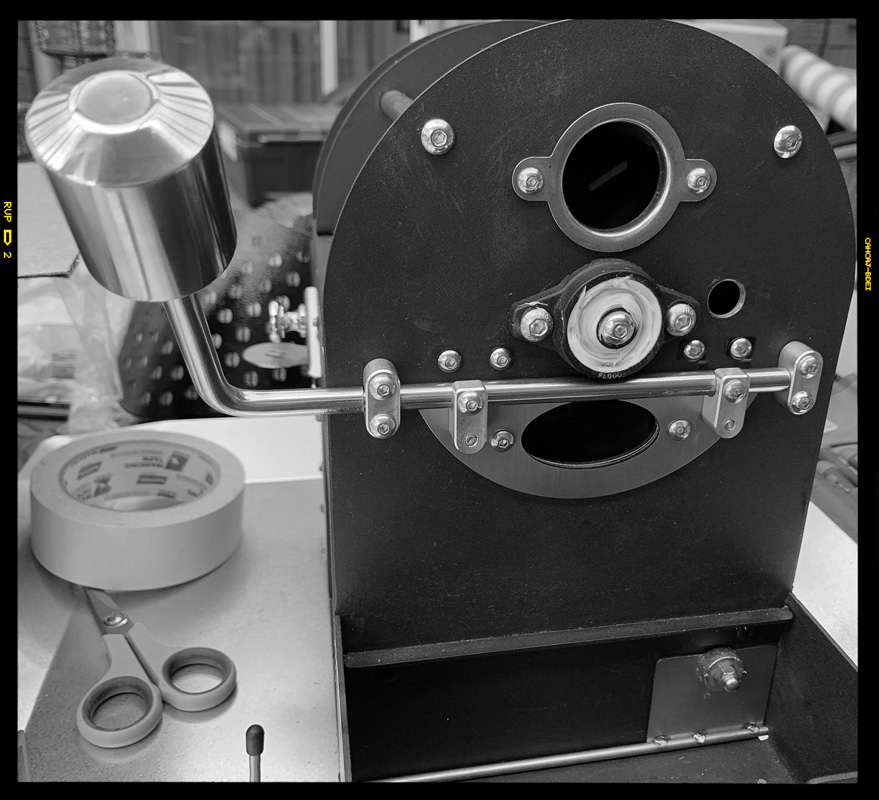
Mounted Door
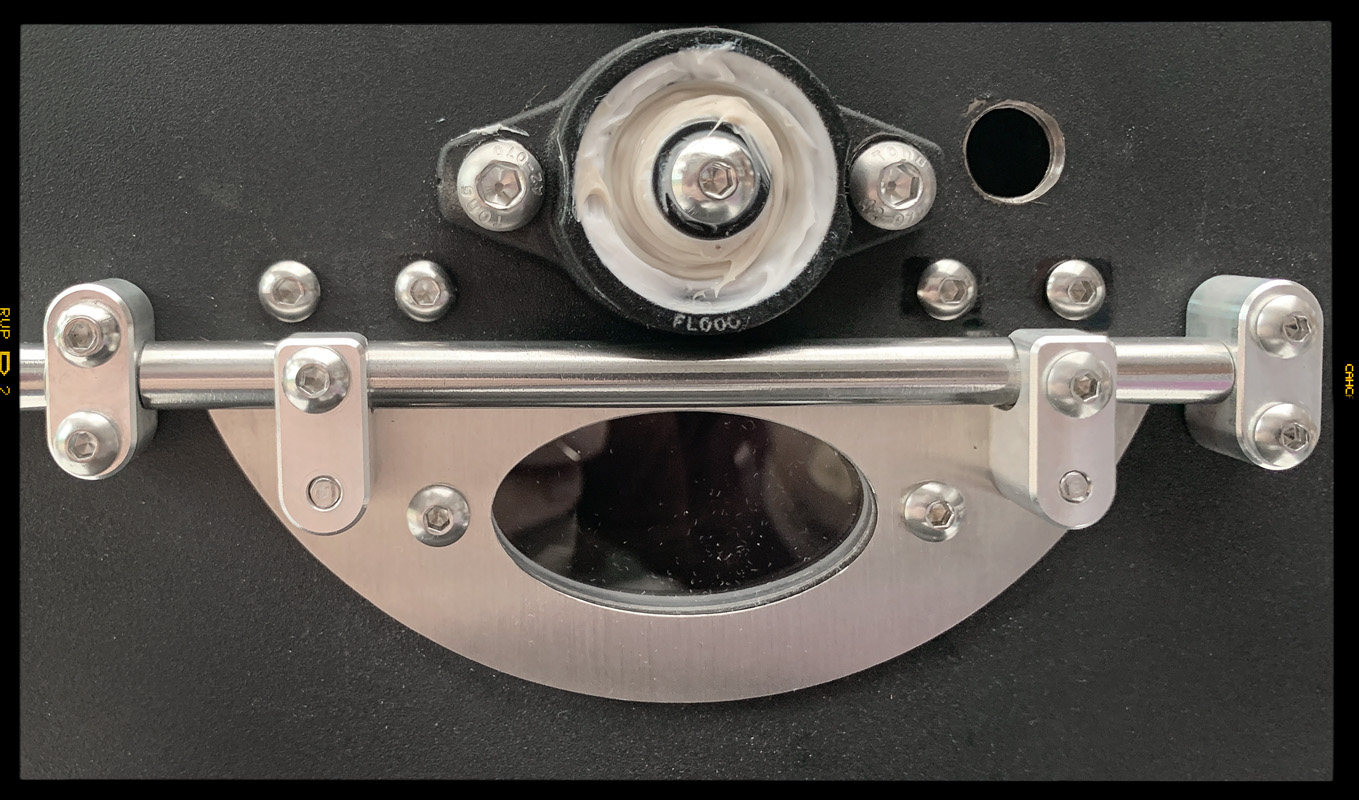
Detail of Mounting Method
Unresolved Details
Despite the door now functioning as intended, I found myself dissatisfied with the appearance of the inner clamps. In particular, the lower screw remained visible,
giving the installation an unfinished look that did not sit well with my perfectionist tendencies.
Improved Aesthetic
At that stage, I chose to use shorter lengths for the countersunk screws installed from behind. This adjustment was made to better suit the requirements of the assembly and to ensure a secure fit.
In addition to the countersunk screws, I cut down two short button head screws to use for fastening from the front. This modification allowed the screws to fit precisely where needed without protruding.
By combining the use of shorter countersunk screws from behind with the modified button head screws at the front, the assembly achieved a more complete and visually pleasing appearance.
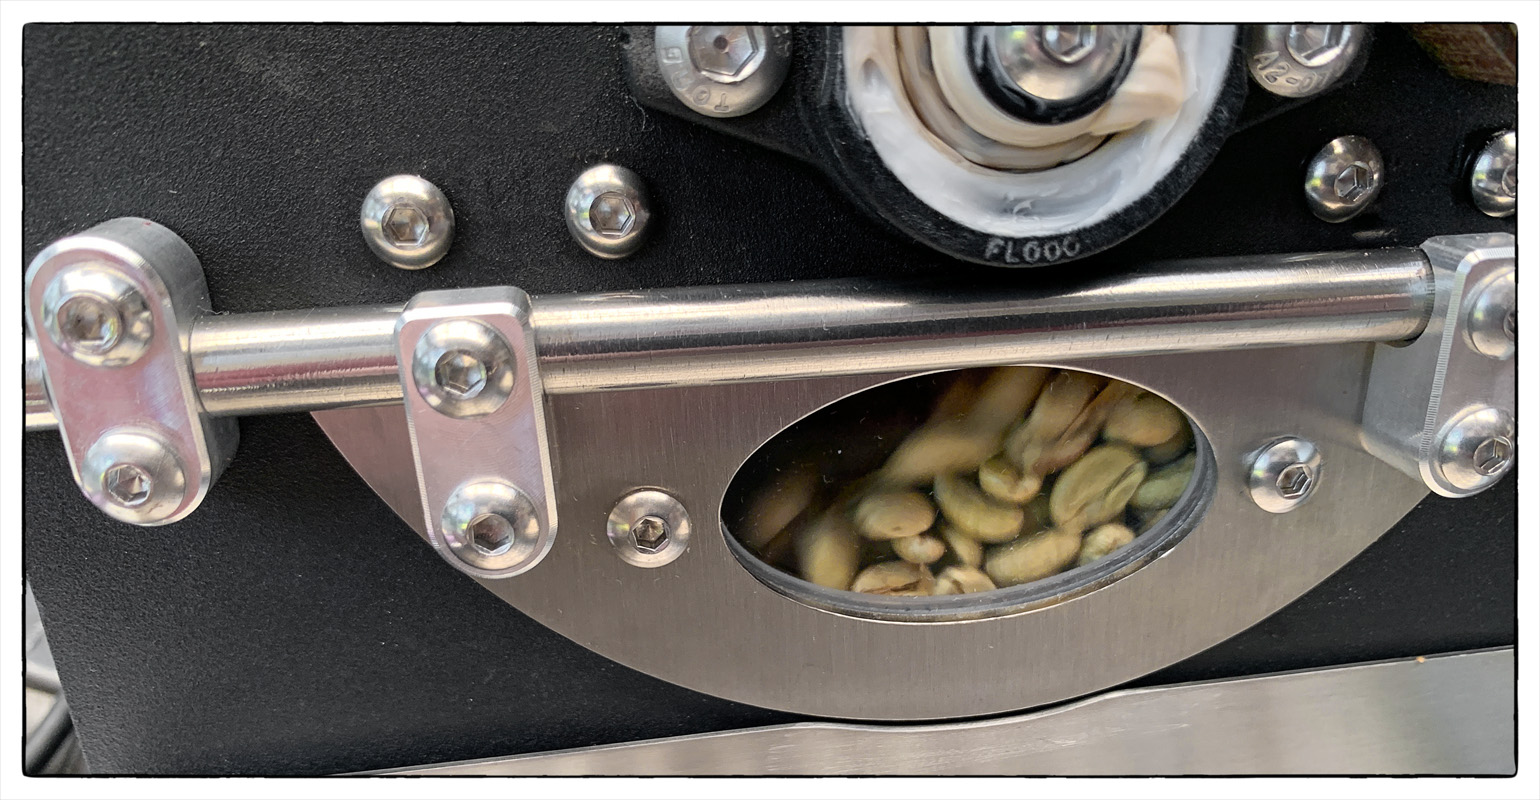
Aesthetically Improved
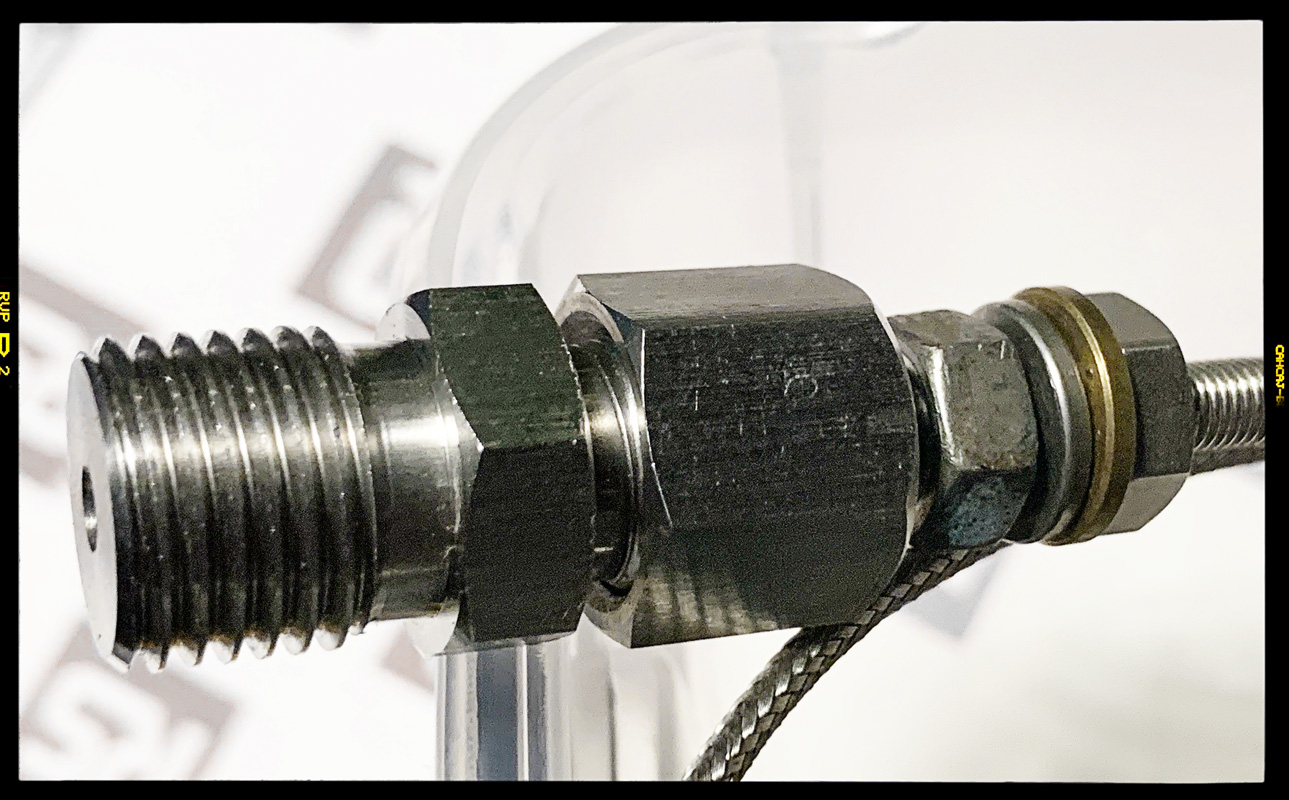
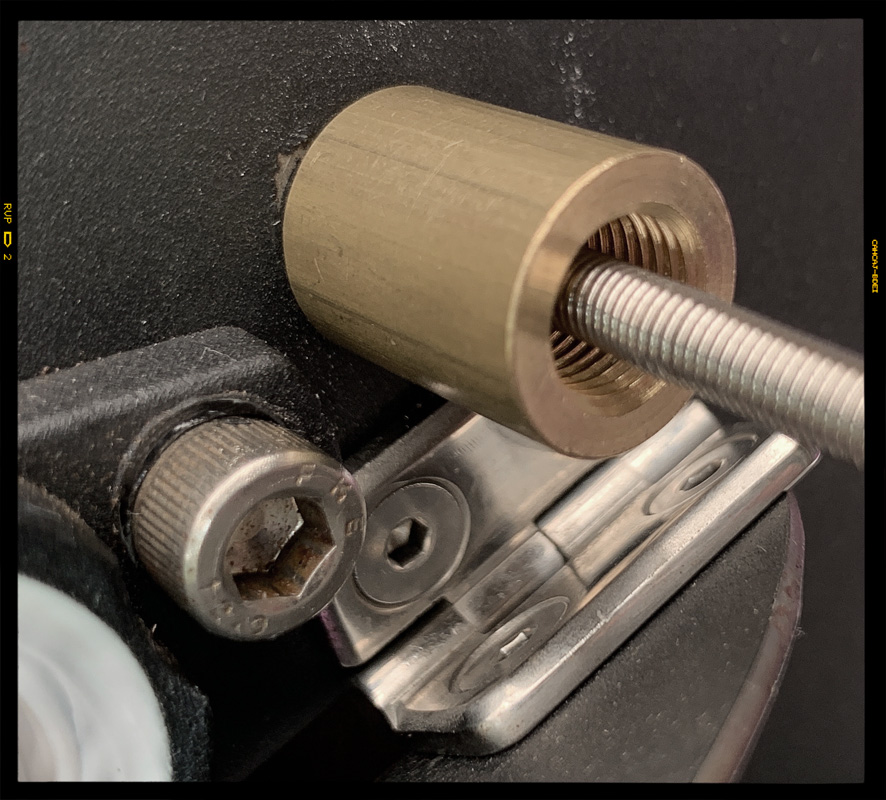
One of the areas that demanded particular attention was the mounting of the thermocouple probe. The unit initially included a rather crude mounting for the thermocouple, which proved to be unstable and inadequate for consistent performance. To address this, several ideas were considered. The first solution involved the use of a Swagelok compression fitting, which was promptly ordered from RS Components. While waiting for the fitting to arrive, a temporary workaround was implemented using some lamp-related brass fittings from my existing collection. However, upon attempting to install the Swagelok fitting, it became evident that it was not suitable, as the length of the existing probe was too short for the fitting to function properly. Ultimately, a small Phenolic adaptor provided the final and workable solution for securely mounting the thermocouple probe.
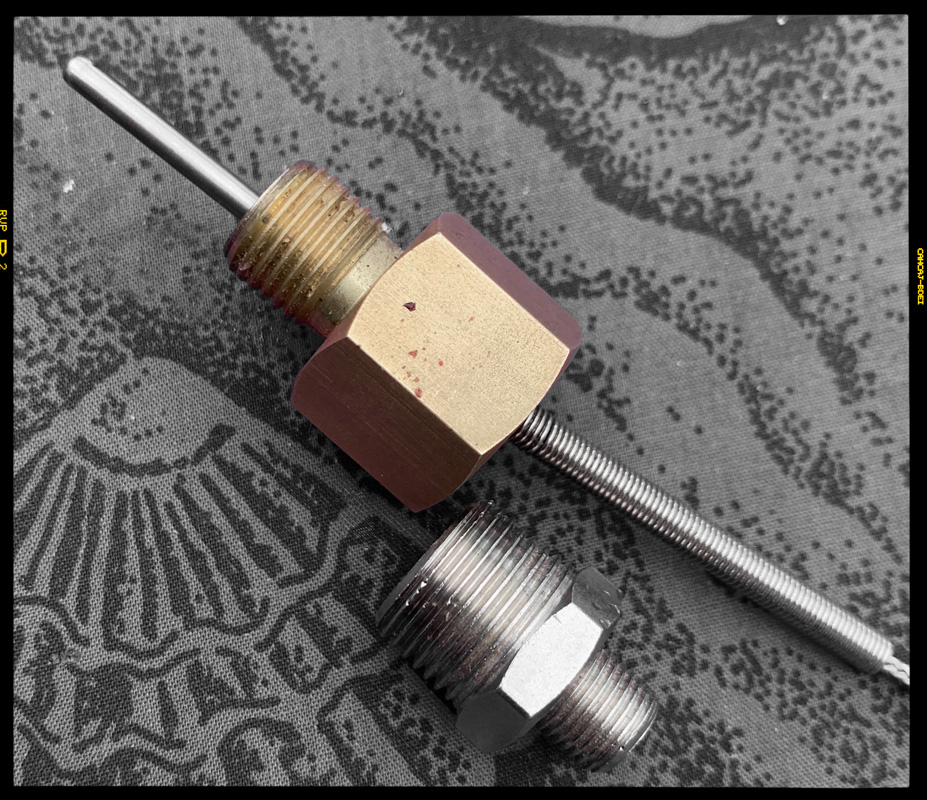
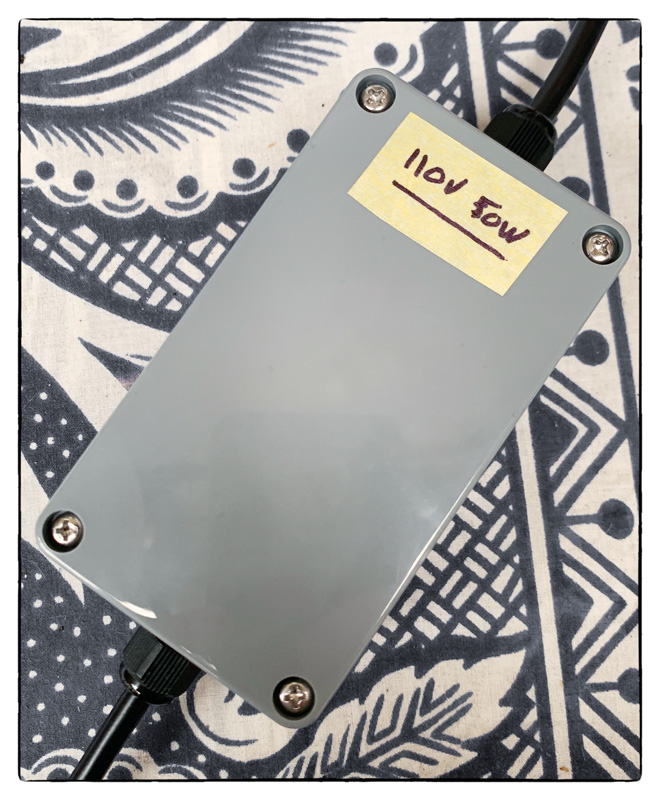
In addition to the probe mounting, the step-down transformer was rehoused as part of the ongoing electrical improvements, ensuring greater reliability and tidiness within the unit, however the long-term plane was to eliminate this altogether.
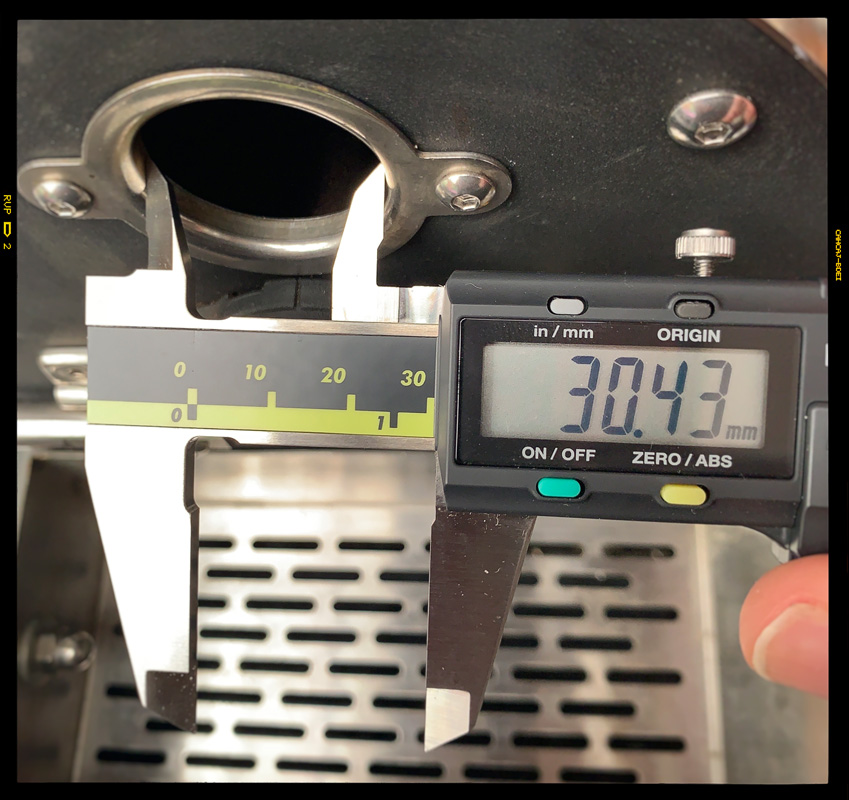
During my research, I noted that current model units are fitted with a hopper cover, whereas my unit lacked this feature. To address this, I measured the diameter of the ring on my unit. I then provided these measurements to the manufacturers, requesting that a suitable hopper cover be checked for compatibility and added to the list of orders.
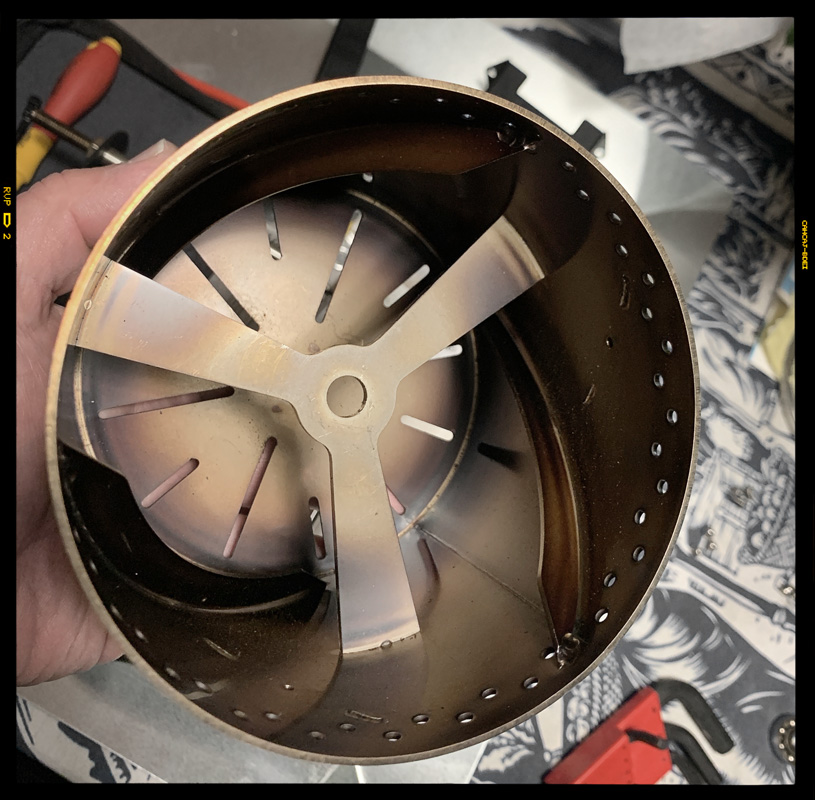
On 12th July 2024, the heat shield received a fresh coat of paint using Rust-Oleum 'Espresso' colour. To enhance durability and preserve the finish, a final clear coat was also applied. The freshly painted heat shield was then allowed to cure for two days before being reassembled.
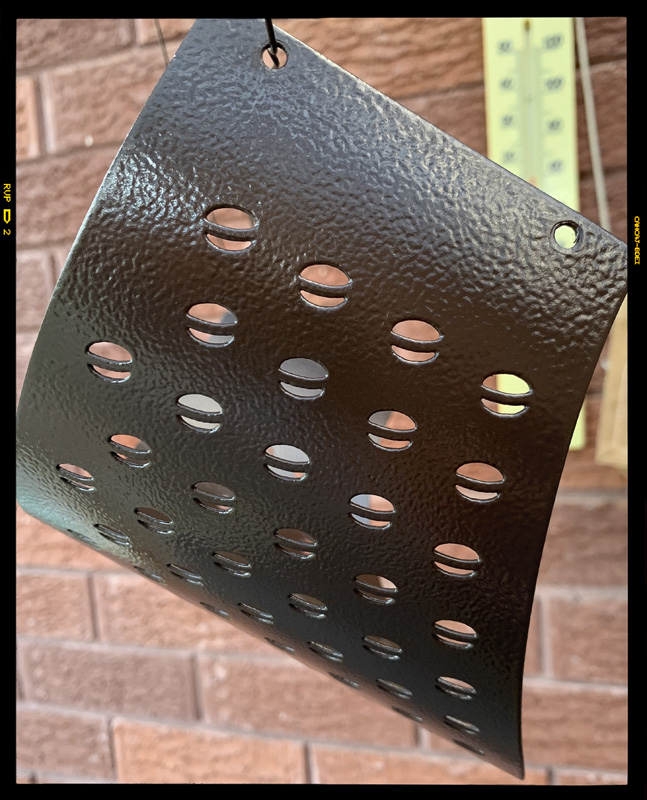
With these significant improvements completed, the roaster was thoroughly tested on 14th July 2024. It was loaded with a charge of green coffee to assess its performance and to identify and address any remaining minor issues that might arise during operation. Throughout this period of modification and testing, ongoing discussions were held with Suji regarding further upgrades. As a result, two substantial orders were placed to secure several key upgrade components, both of which were in transit to Australia at the time.
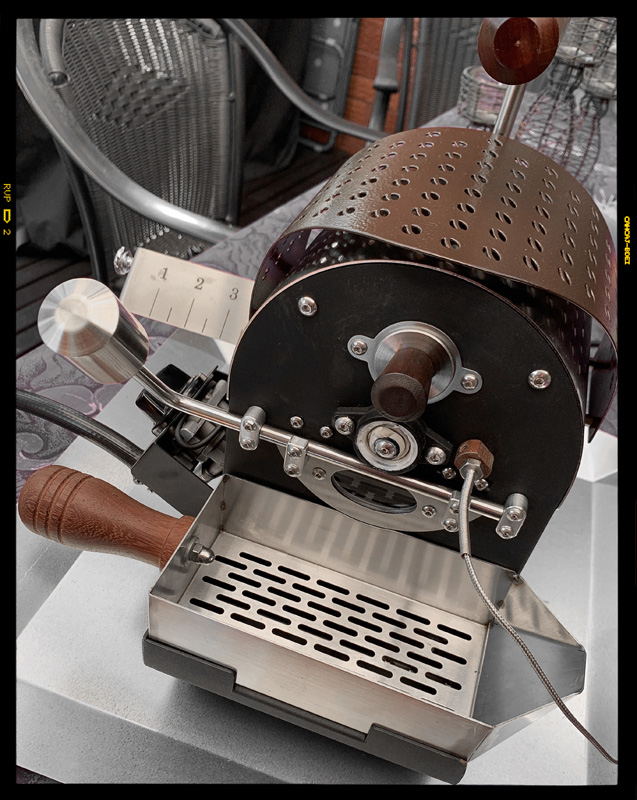
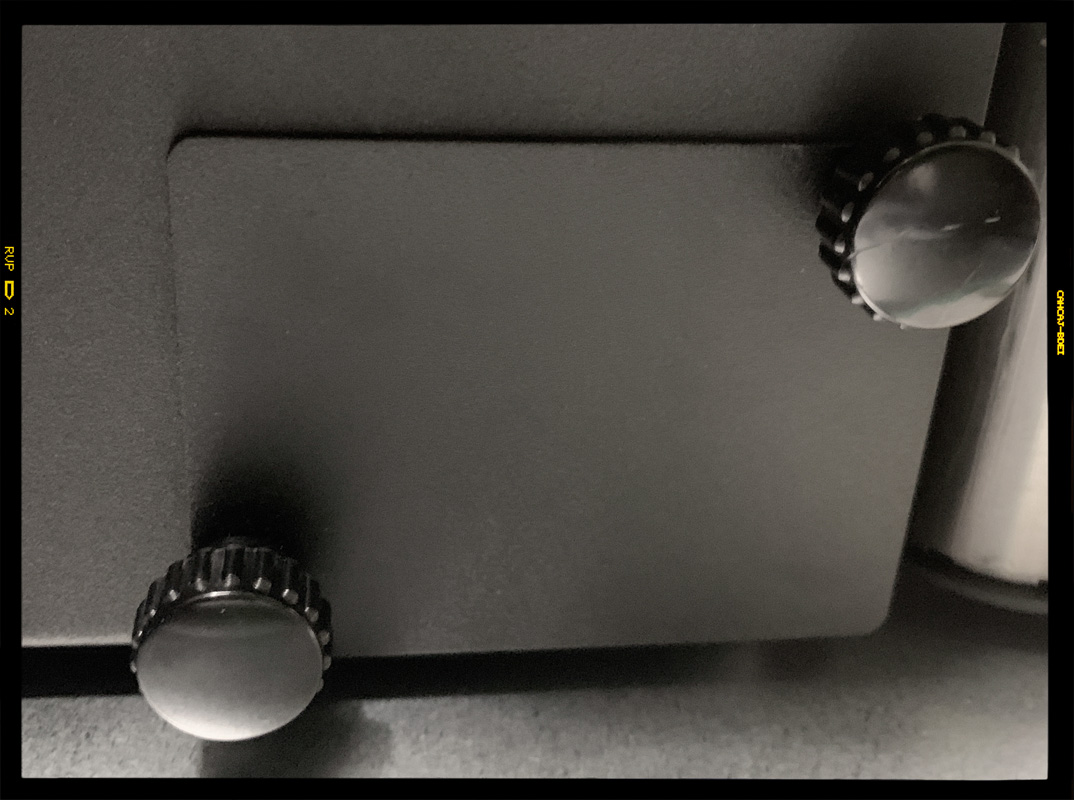
On 18th July 2024, another minor yet practical modification was made to the roaster. Thumb screws were added to the access panel on the side of the unit, making it significantly easier to open for cleaning and maintenance purposes. While these upgrades have marked considerable progress, the work on the unit remains ongoing, with further enhancements and refinements planned for the near future.
The 22nd of July 2024 marked an important milestone in our project, as we received the first shipment of parts from Suji, located in Indonesia. This initial delivery set the stage for a period of significant progress, with major works scheduled for completion over the subsequent four months. During this time, we encountered a number of intertwined challenges that tested our expertise.
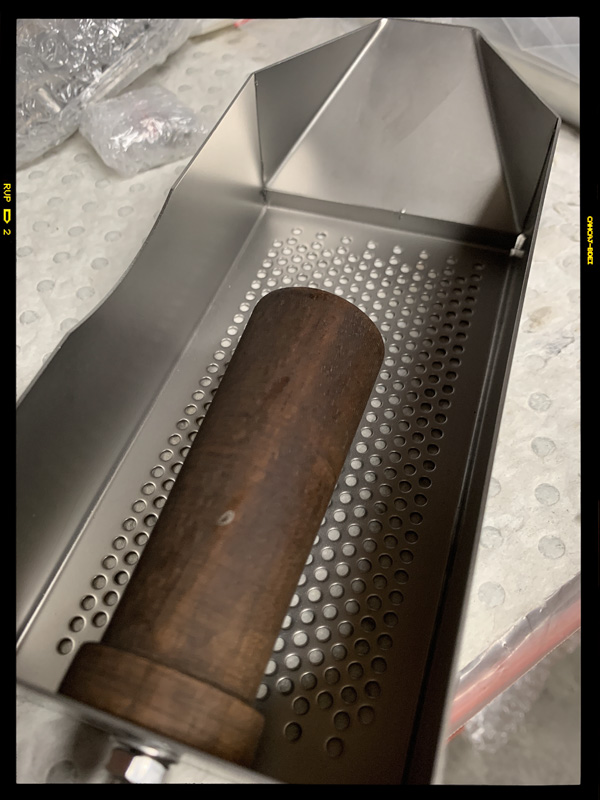
The first of three shipments from Suji included several key components required for our operations. Among these were a new door, hopper cover, cooling tray, a handle, and a chaff tray designed to sit beneath the burner. Additionally, we placed an order for replacement bearings to ensure that we had spares on hand, anticipating any future maintenance needs.
Upon arrival, the new door supplied by Suji immediately stood out due to its impressive build quality and thoughtful design. The attention to detail was evident, making it clear that this component was a significant upgrade over the original door provided by Yoshan. Not only was the material and construction superior, but the finish and overall craftsmanship also reflected a much higher standard.
Furthermore, the experience of dealing with Suji was notably positive. Communication was prompt and clear throughout the process, with responses that were proactive and supportive. This level of service contributed to a smoother and more satisfying project experience overall.
In the second delivery, we received further components critical to the continued progress of our project. This shipment comprised a drum motor, power box, and a selection of other ancillary parts necessary for the assembly and functionality of our equipment.
On 5th August 2024, an order was placed for a set of stainless-steel round standoffs. These were chosen to replace the original brass hex standoffs, introducing a subtle touch of refinement to the assembly.
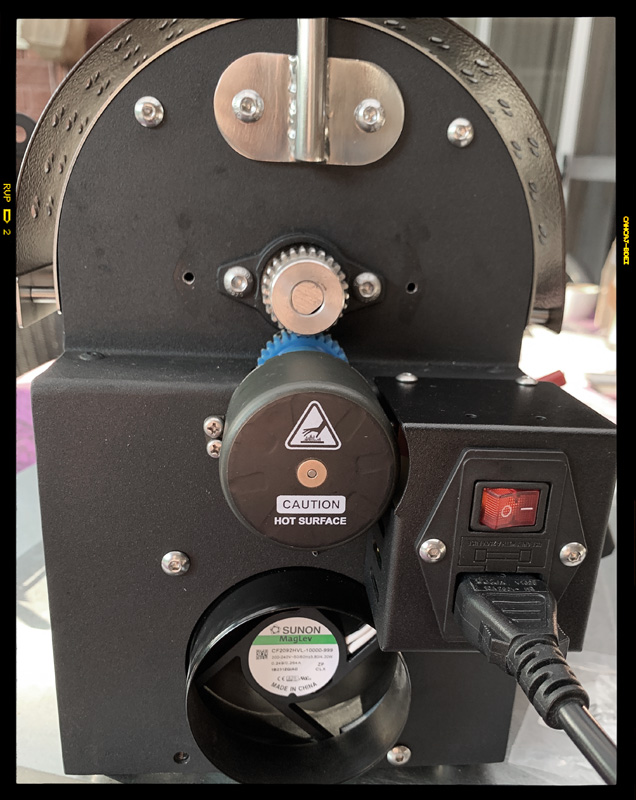
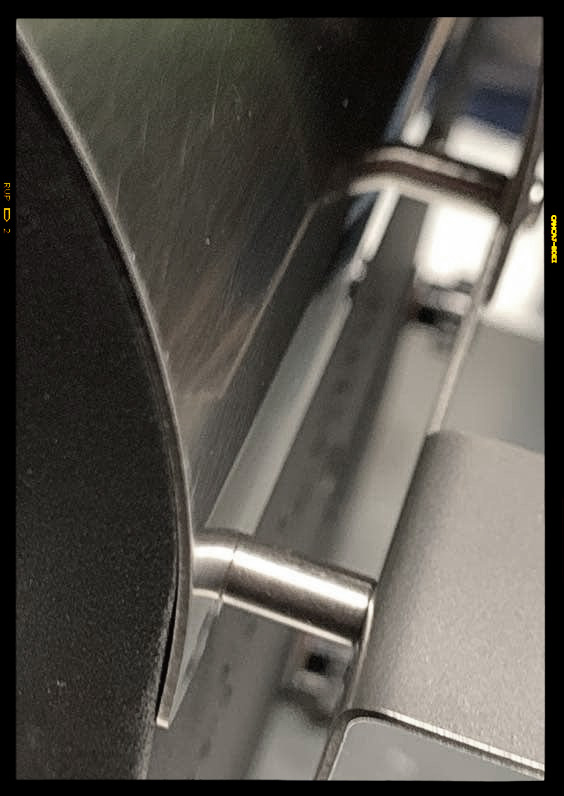
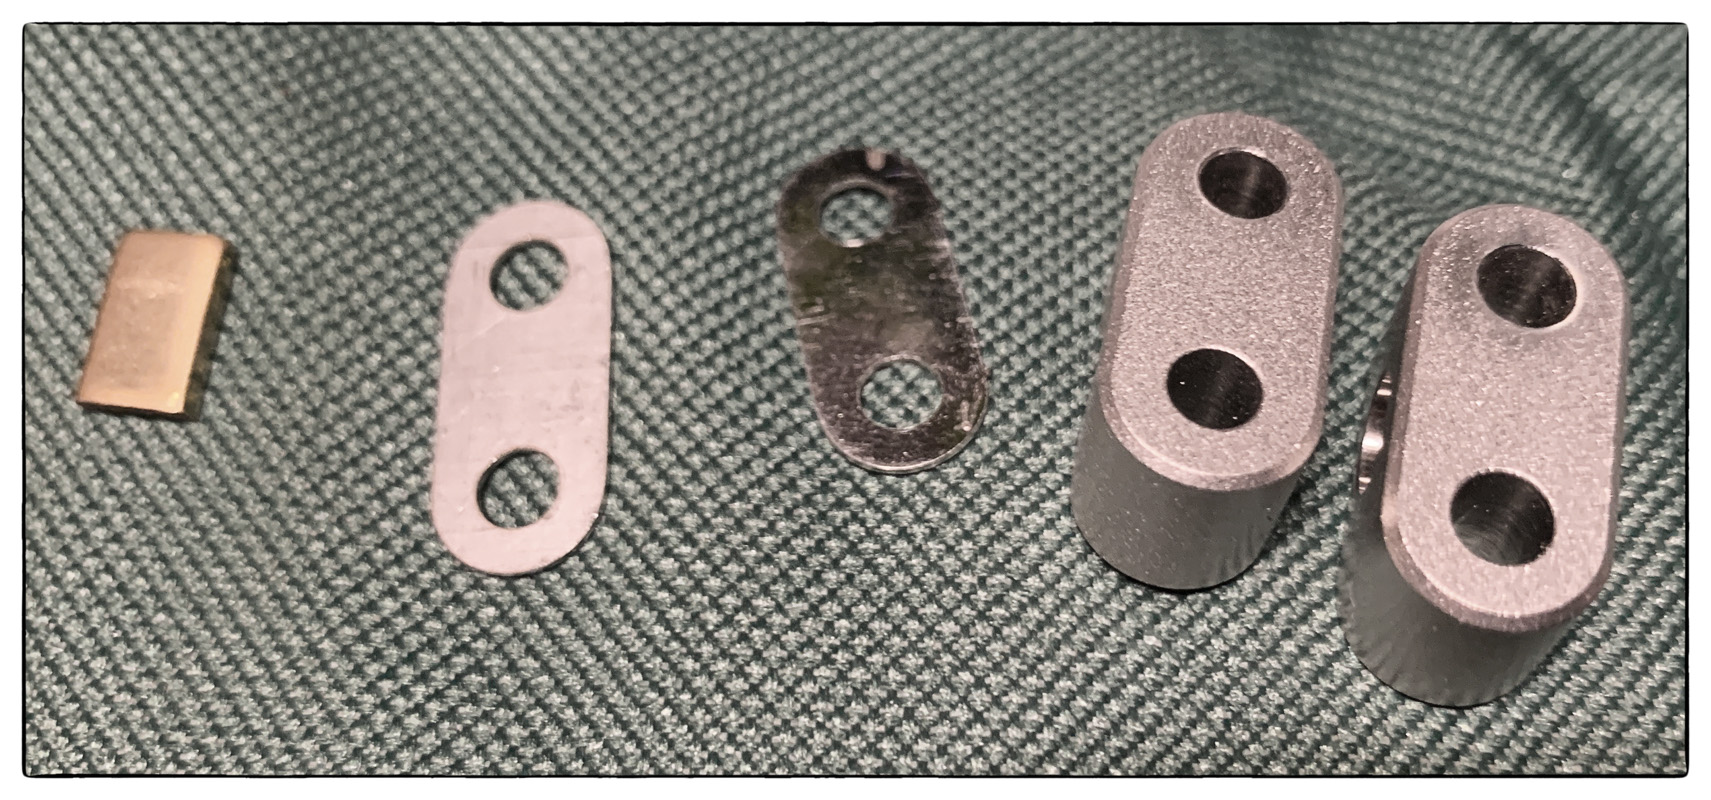
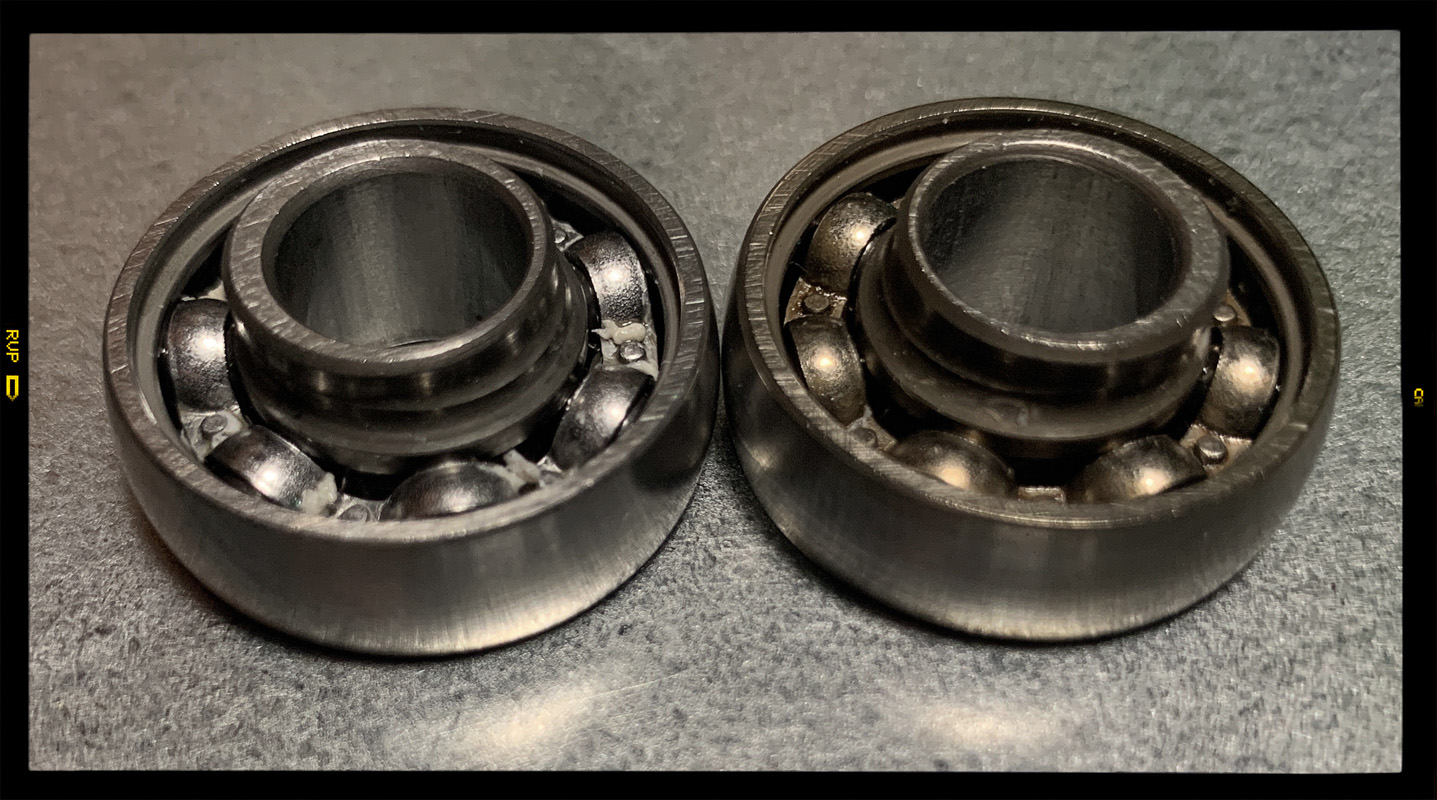
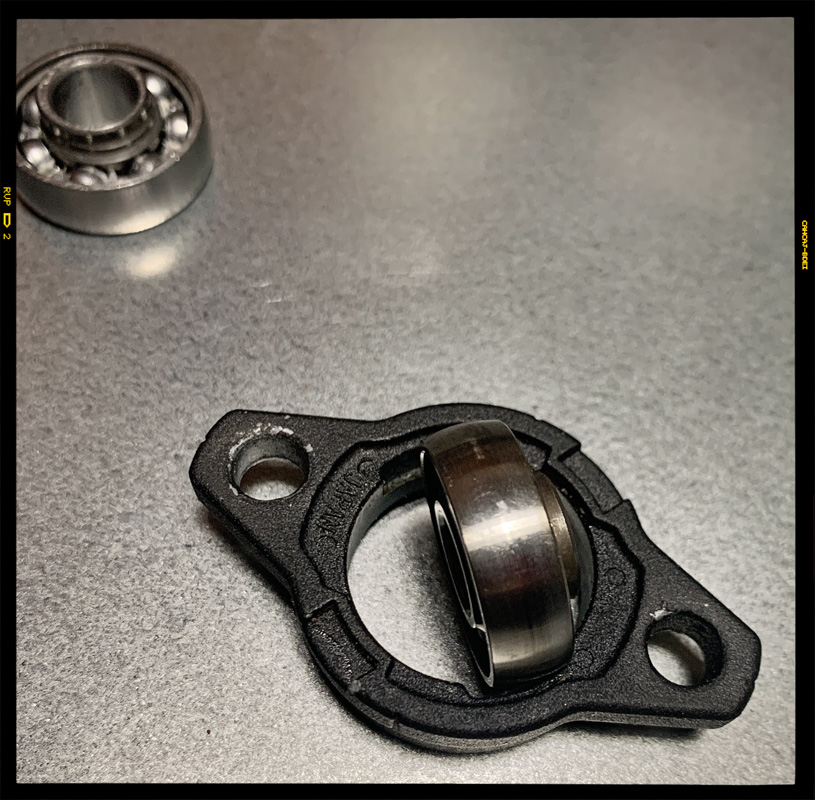
The next major phase commenced on 11th August 2024, involving a complete dismantling of the roaster. This included the removal of the drum to gain access to both sets of bearings for thorough cleaning. Additional adjustments were made to properly align the door, ensuring it did not interfere with the frame. This comprehensive work was completed over the next six days, culminating in a test roast conducted on 17th August 2024.
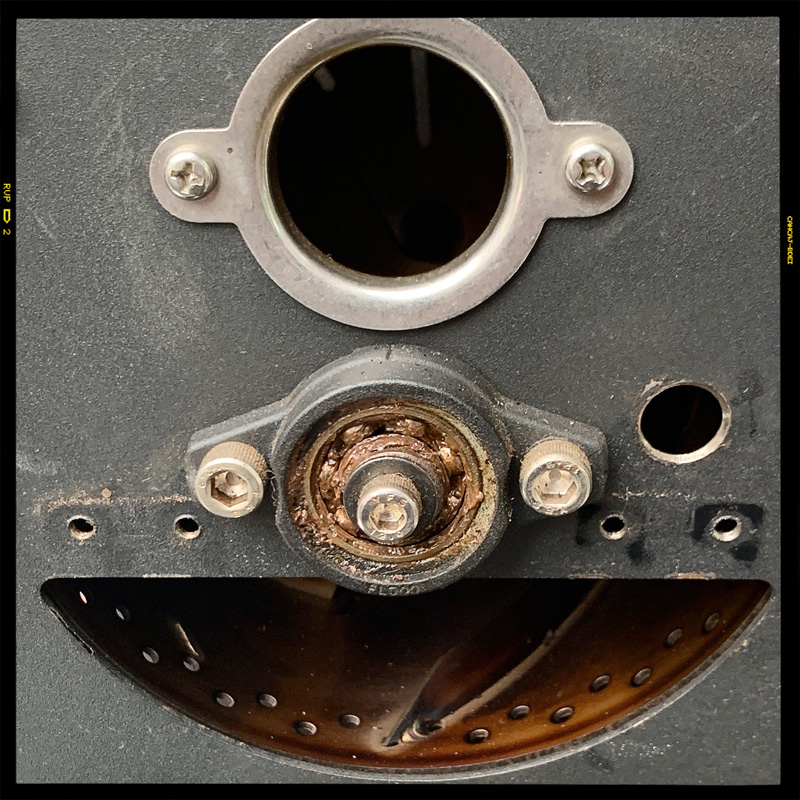
During the disassembly process, a notable difference can be seen between the front and rear bearings. Specifically, the front bearing exhibited significant discoloration compared to the rear bearing. This phenomenon is commonly seen across all types of roasters and can be attributed to the fact that the front bearing is subjected to the majority of the thermal load generated within the roasting system.
In larger roasters, this thermal exposure is addressed by ensuring that the bearings are packed with high-temperature grease. Regular maintenance and timely replacement of these bearings are standard practices to manage and maintain the roaster's reliable operation.
Note on Roaster Drum Seasoning and Maintenance
A critical detail in the handling of the roaster drum is to never clean a seasoned drum. The seasoning process imparts a natural layer of coffee oils onto the drum's surface. This coating serves several important purposes: it helps remove residual manufacturing oils and metal filings, establishes a protective non-stick layer for future production roasting, and acts as a preventative measure to ensure reliable and consistent performance of the roaster.
If the seasoned coating is removed, the drum must undergo a re-seasoning process. This involves performing several sacrificial roasts, during which the roast profile is intentionally pushed beyond second crack and skimming close to the pyrolysis phase. At this stage, beans are roasted at very high temperatures, specifically around 232°C and allowed to coast at this temperature for a period of time. This procedure facilitates the build-up of a desirable layer of coffee oils on the drum's interior surface.
The seasoning step must be carefully managed, as roasting beans at these elevated temperatures carries the risk of ignition. It is therefore essential not to exceed the upper temperature limit of 232°C during the process to ensure safety and prevent accidental combustion of the beans.
A central objective of the project was to eliminate the need for a voltage stepdown transformer. The focus was placed on two main components: the drum motor and the cooling fan located at the back of the roaster.
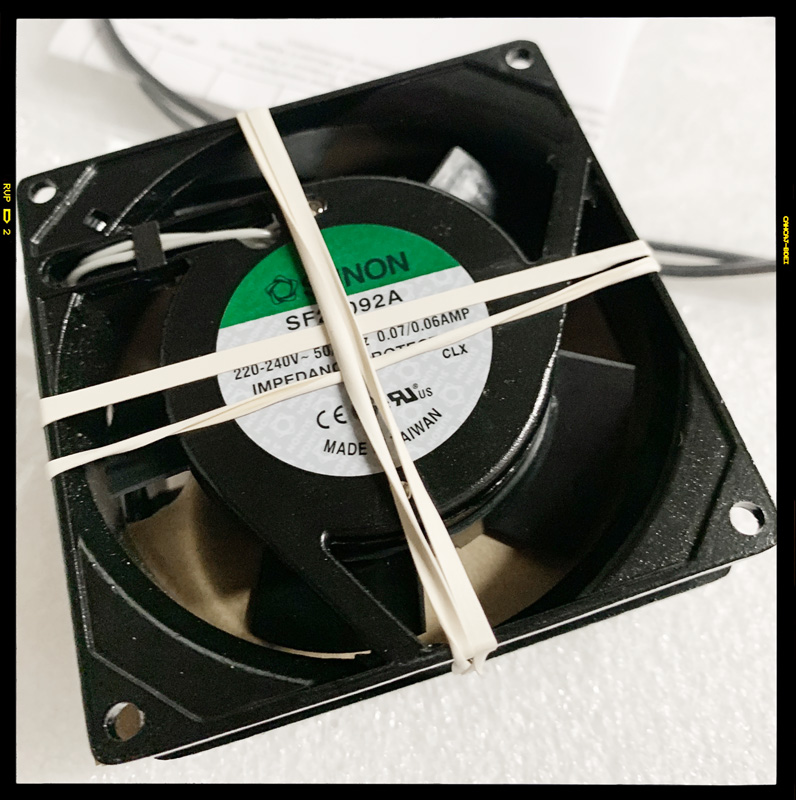

Notes on Main Airflow Fan & Drum Motor Replacement
For the Main Airflow fan, further research was undertaken to source an equivalent fan or one with improved airflow. The Sunon range of fans was identified as a good choice and relativly easy to source.
Our local Electronics store, Jaycar Electronics did not cary stock of the 92mm 240VAC variants. I then looked through the Altronics catalogue, and found they stock the Sunon CF2092HVL-10000-999 (Cat.No: F1158A), and as I was able to pick one up, I purchased one for further testing. This fan utilised UL94V-0 thermoplastic for the housing and blade, in contrast to the original's metal frame. Key features included improved airflow (52CFM at 50Hz) and the correct 92mm size. Operating temperature was also considered, with the new fan falling within the original's parameters.
During the test roast, it was observed that the fan would slow down and eventually stop towards the end of the roast. Investigation revealed that the thermal protection was activating, cutting power to the fan. As MagLev bearing fans employ a small electronic controller within the hub, elevated ambient temperatures from the roaster's exhaust was triggering the thermal cutoff, unfortunately, I was not able to use this as the primary airflow fan (which would have been good for its improved airflow capacity).
As a side note, the current model of this roaster, features a secondary fan on the side of the cooling tray, however this would not have any affect on the more important airflow through the drum so was not as critical to have on my roaster (which would need additional cutout in the framework).
Further research led to the identification of the Sunon SF23092A-2092HBT.GN, available through Mouser (Cat.No: 369-SF23092A2092HBT). With an airflow rating of 30CFM at 50Hz, this matched the original fan's performance at 110V/50Hz. Coincidentally, Suji confirmed that this exact model is used in their current units. The order was placed with Mouser on 3 September 2024, and the new fan arrived shortly after, along with the new drum motor from Suji. These components were then installed to complete the full electrical upgrade.
Drum Motor
Regarding the drum motor, the OEM of the SD-208 motor was contacted. As single units were not available, discussions with Suji revealed that they could supply a suitable motor together with the electrical housing.
This housing featured a mounted PCB containing the capacitor and a header for the fan, resulting in a cleaner and safer implementation. Additional KAPTON tape was applied to the board to enhance electrical insulation.
The new fan, drum motor and electrical box were finally installed on 3rd September 2024. This marked a significant milestone in the ongoing maintenance and upgrade of the roasting equipment.
The third and final shipment in the sequence of deliveries from Suji arrived on 29th August 2024. This delivery was notable as it completed the supply of essential parts required for the roasting system upgrade. Included in this consignment was a new gas burner, featuring a needle valve and gauge. The addition of these components ensures precise control over the gas flow and offers reliable operation, which is particularly important for accurately tracking and adjusting gas settings during the process of refining roast profiles.
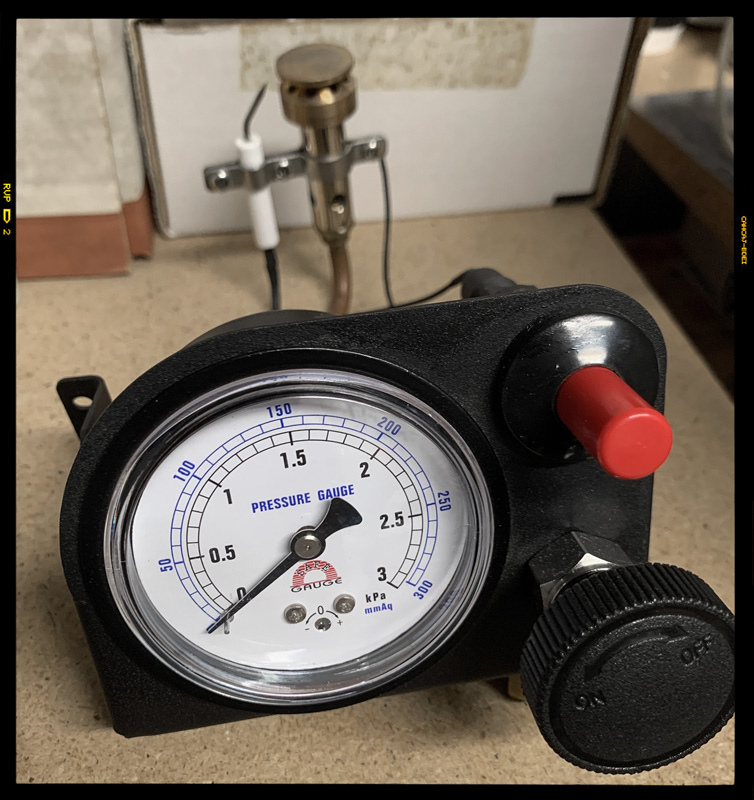
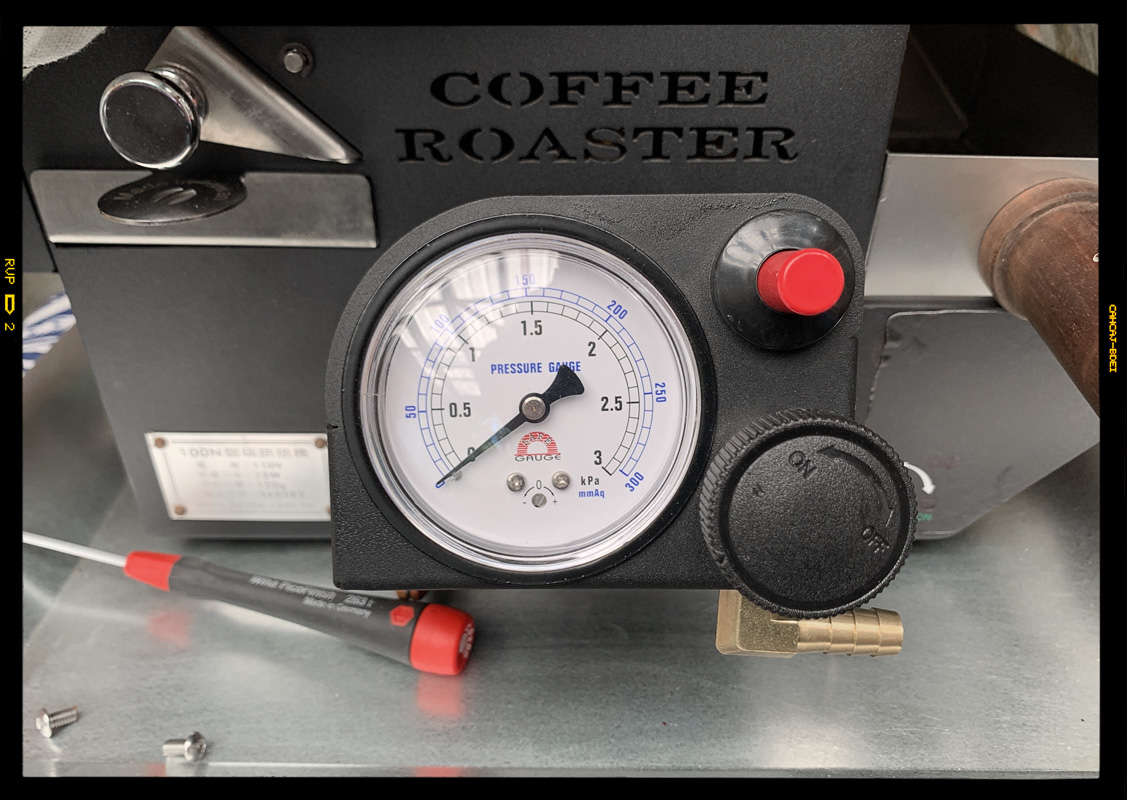
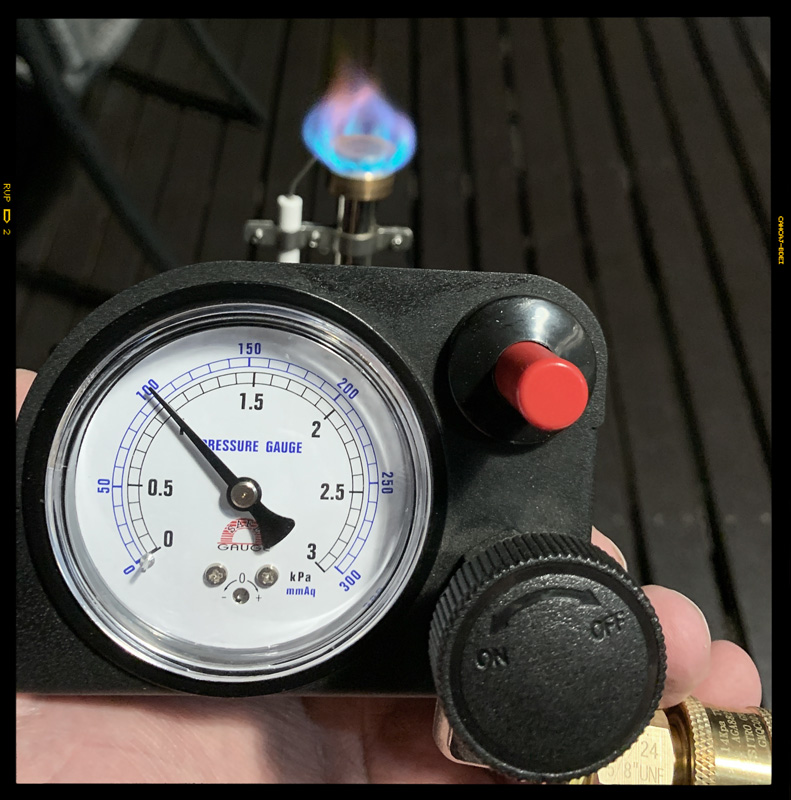
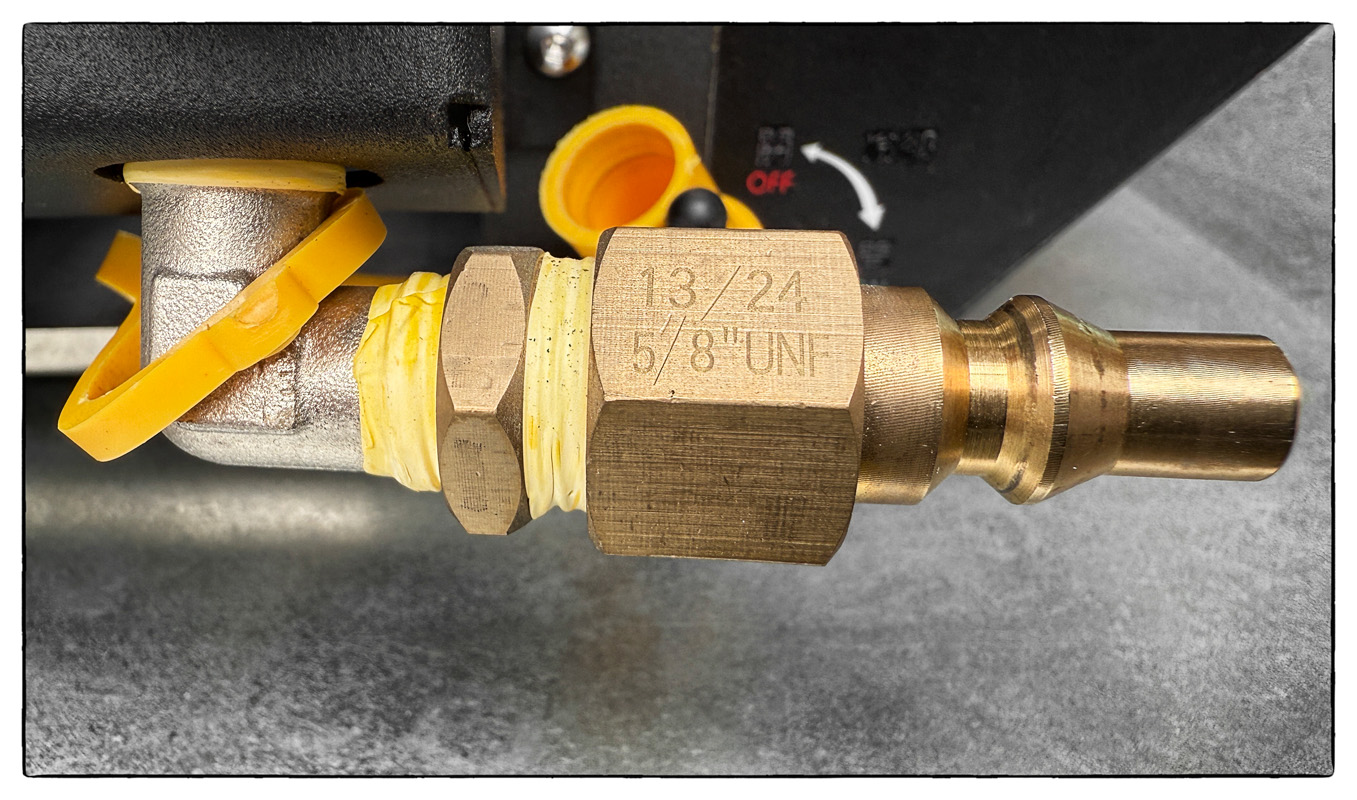
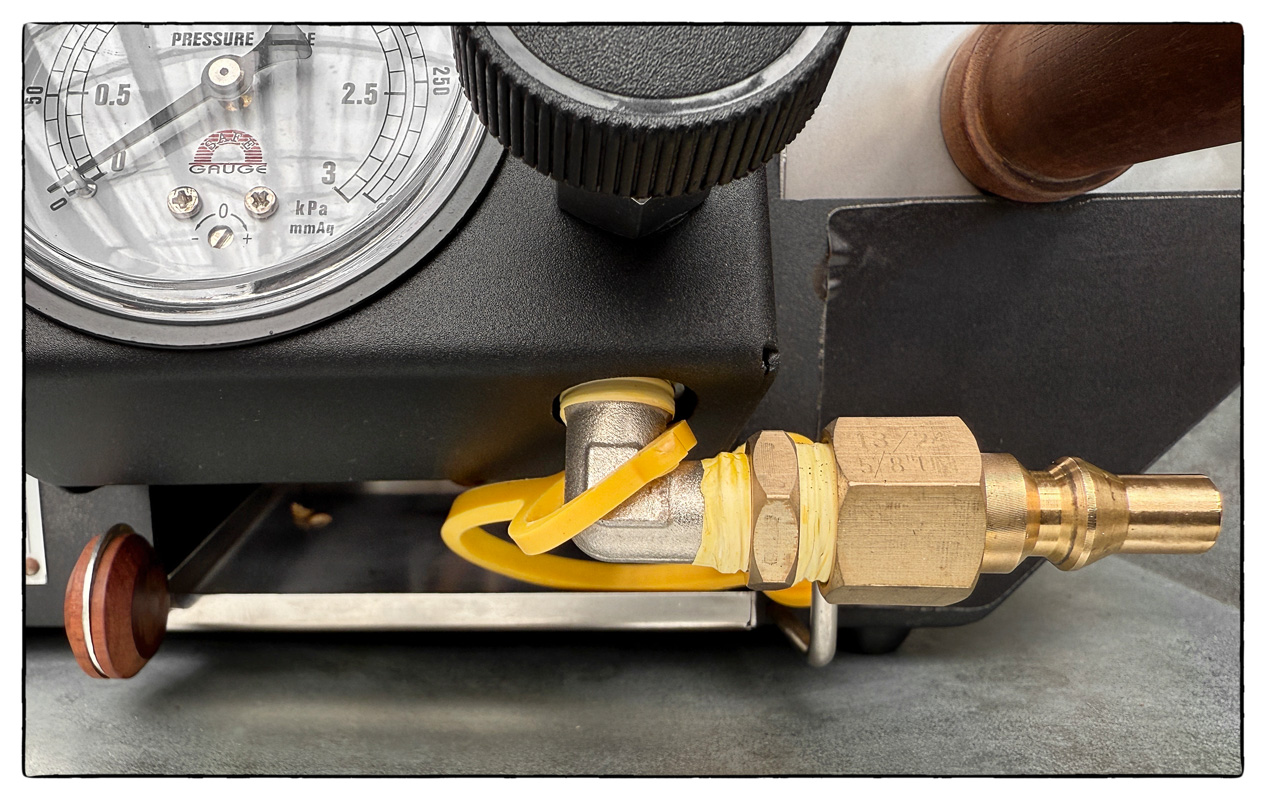
The newly supplied gas control unit was equipped with a 1/4" 90° elbow fitting, which was then connected to a 1/4" to 3/8 SAE adaptor. This configuration enabled the use of a 3/8 SAE Quick Connect set (Type 2), enhancing the overall gas connection system. These upgrades facilitated a more secure and efficient connection to a small 4.5 kg LPG gas bottle, contributing to the safety and ease of handling during operation.
With the arrival of these additional parts, a chaff tray was also obtained and positioned under the gas burner. This tray plays a key role in capturing chaff and debris generated during roasting, and allowing for easier removal of chaff that does find its way under the drum.
Following the final upgrade works, on 12th September 2024, further test roasts were conducted, which revealed the need for additional fine adjustments. Specifically, attention was required for the bearing and drum alignment, as well as the clearance between the drum and the rear of the front panel. These adjustments were essential to prevent small bean fragments from falling into the gap and jamming the drum during operation.
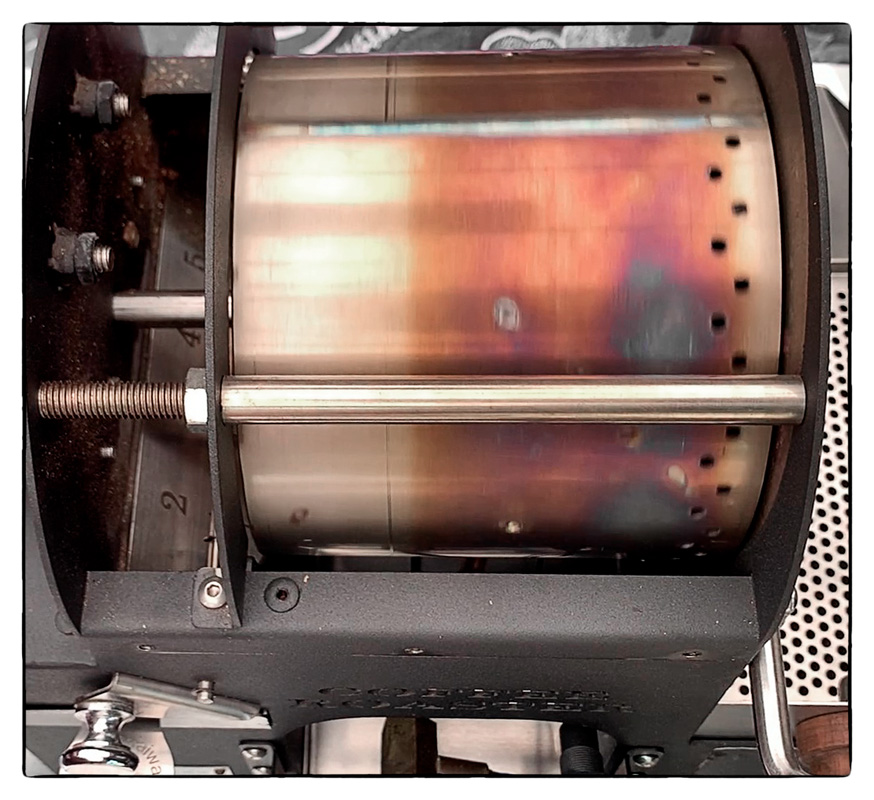
After making the necessary mechanical adjustments, several heat cycles had to be performed. This step was crucial to account for thermal expansion that occurs when the equipment reaches operating temperature. The gap between the drum and the rear of the front panel needed to be set correctly to ensure that, at a full operating temperature of approximately 220°C, the gap would measure around 1 to 1.5 millimetres. This precise setting was important to maintain optimal performance and avoid future operational issues.
An important aspect of coffee roasting is the rapid cooling of the beans once they are removed from the roaster. Effective cooling halts the roasting process instantly, helping to preserve the desired flavour profile and prevent over-roasting.
The cooling capability of the roaster itself leaves much to be desired. In its initial design, the roaster's main airflow fan also serves the cooling function. A magnetically held panel located beneath the cooling tray can be operated using a lever positioned next to the gas control. However, using this panel during consecutive roasting sessions reduces airflow from the roaster, which is far from ideal.
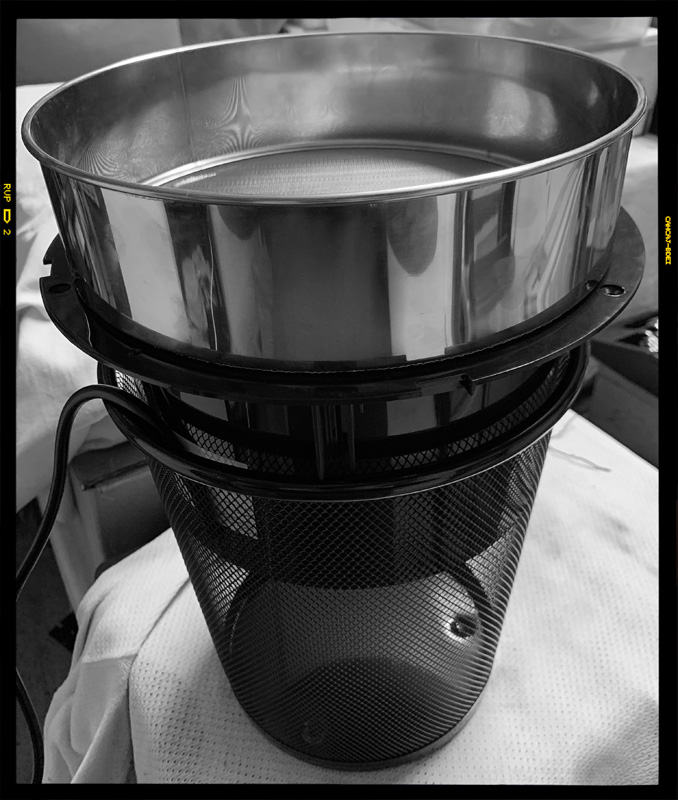
A more effective and affordable cooling method was needed. While Gene Café offers a cooling tray setup, it costs over $240.00 and essentially consists of a standard muffin-style fan paired with a mesh tray.
Taking inspiration from MacGyver, a practical and highly efficient solution was developed for under $60. This setup uses a standard bathroom extractor fan, a waste basket from Officeworks, and a sturdy mesh sieve from a kitchen supply store. The efficiency of this arrangement is impressive, enabling the beans to cool within seconds.
The new cooling setup was completed on 26th August 2024 and has been thoroughly tested during subsequent roasting sessions and consistently delivering excellent results.
As of 19 November 2024, seven months of dedicated work have culminated in the completion of the roaster project. This significant milestone marks the transition from the construction and setup phase to the next stage: gaining practical experience with the new equipment.
With the roaster now fully operational, the focus shifts to understanding its unique characteristics. This involves a process of observation and experimentation to become familiar with how the roaster responds to various controls and inputs. Gaining this understanding is essential for achieving consistency and precision in each roast.

The immediate objective is to develop the skills necessary to control the roaster effectively. The benchmark goal for this phase is to replicate the profile of one of our long-time favourite coffee blends. Successfully matching this established profile will serve as an indicator of both the roaster's capabilities and my ever growing proficiency in roasting coffee.
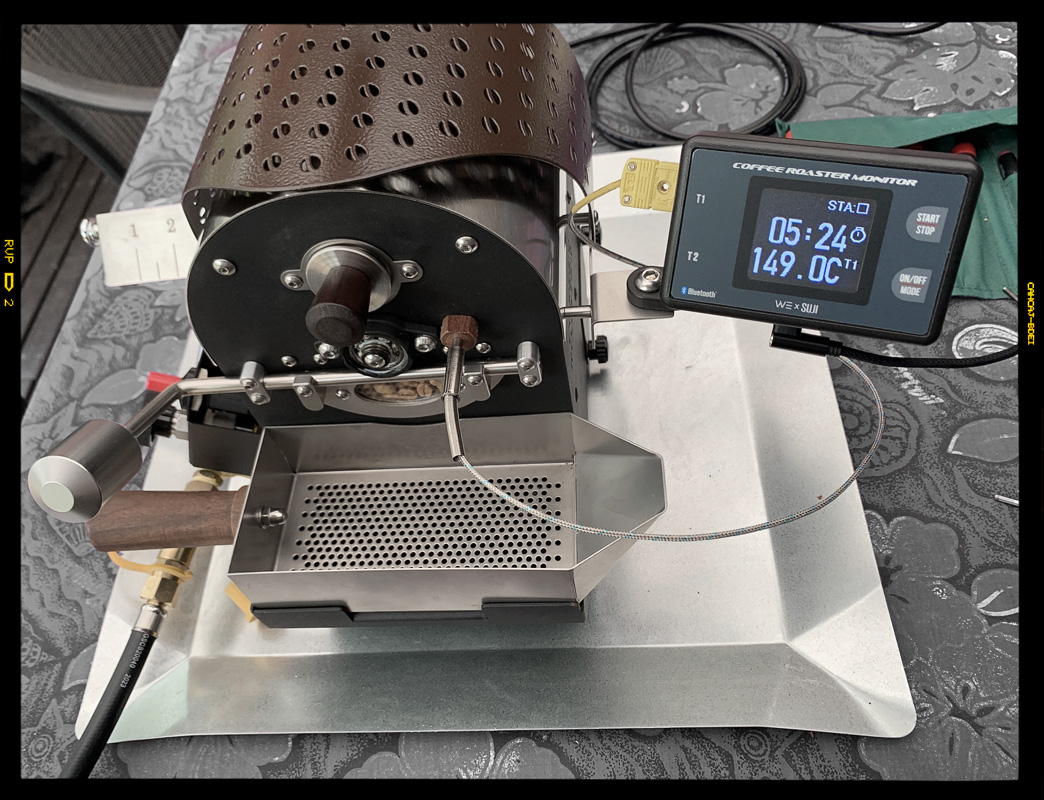
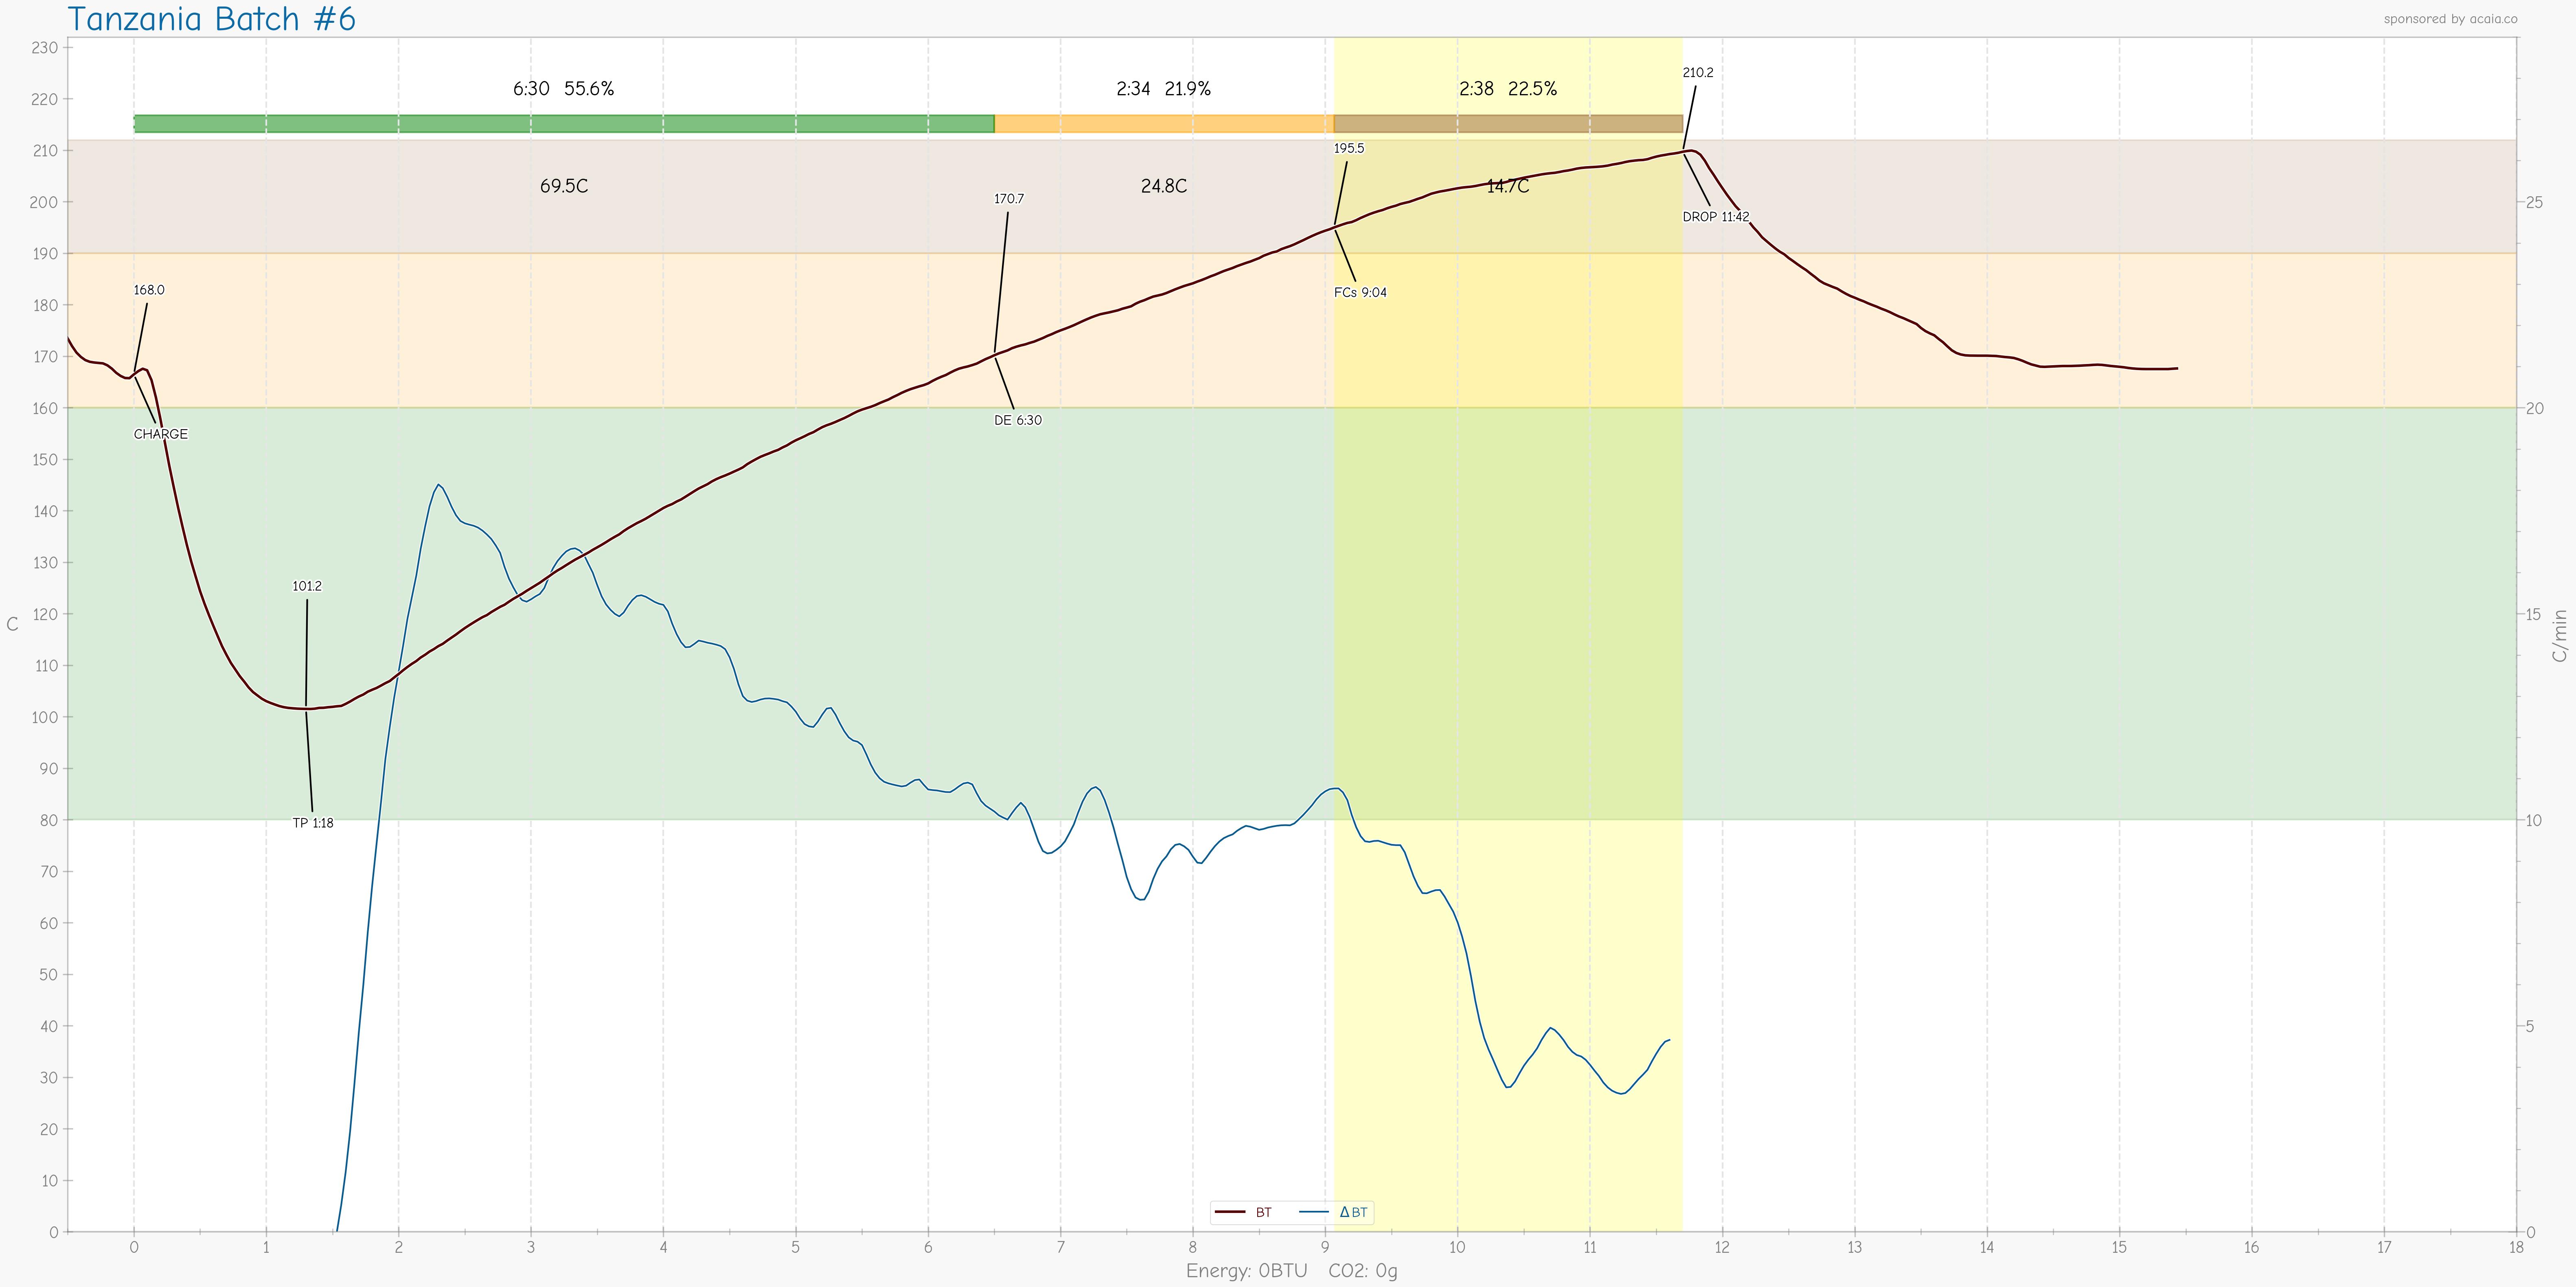
The Roaster's temperature data is systematically logged using the Artisan roasting software. This software provides visual feedback on the roast profile, allowing for effective monitoring throughout the roasting process.
The addition of the monitoring hardware, makes it possible to track important milestones during the roast. The software records and displays temperature changes in real time, helping to observe and respond to key developments as the roast progresses.
In August 2025, I purchased a small second-hand HP laptop to serve as a dedicated computer for my roasting activities. The objective behind this acquisition was to have a reliable device exclusively for managing and monitoring all aspects of the roasting process, ensuring efficiency and consistency in operations.
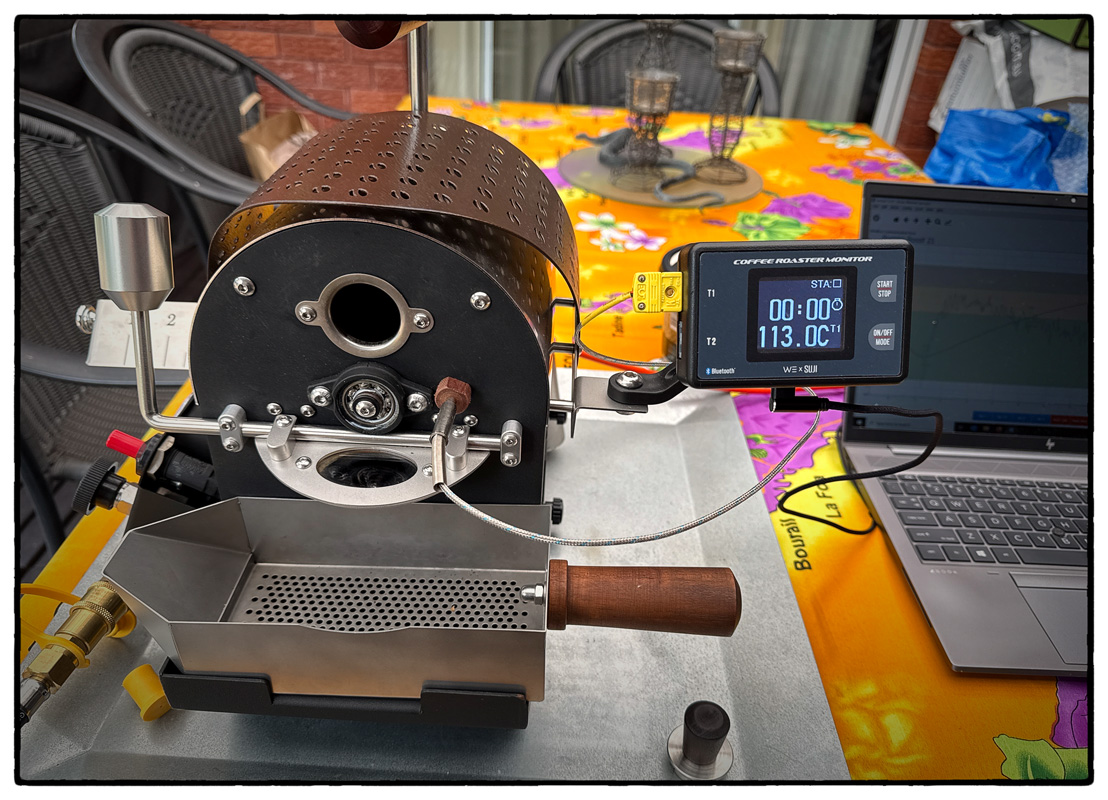
Coffee roasting is a complex process that requires substantial theory, learning, and experience to master. While a thorough review of coffee roasting is beyond the scope of this basic section, it is important to recognise the depth involved in this craft.
As an overview, understanding the key events that occur during coffee roasting is essential for appreciating the process. These events form the foundation for developing expertise in roasting and mastering them demands both practical experience and theoretical knowledge.
Key Roasting Events:-
We begin with the roaster preheated and stabilised. The charge of green beans are introduced into the roaster via the hopper. This is known as the Roaster Charge Temperature.
and the temperature at which greens beans are charged into the roaster to begin the roasting process. There is an initial drop in roaster temperature as the cool green beans are absorbing the ambient heat.
TURNING POINT (OR TURNAROUND)
This is where the temperature of the beans have reached temperature "equilibrium" with the Roaster temperature and signals the end of the initial heat absorption phase and serves as a critical reference
for consistency, with a quick turnaround suggesting a less dense coffee that heats faster and a slower turnaround indicating a denser coffee that heats more slowly.
Additional Notes:
A Measure of Momentum:
The time and temperature of the turning point provide information about the roast's momentum, with a fast turnaround showing the roast has quickly taken on heat.
Consistency:
A consistent turning point for the same coffee roast indicates that the variables (like batch size and charge temperature) are consistent.
Density Indicator:
A fast turning point suggests a less dense coffee that absorbs heat quickly, while a slow turning point implies a more dense coffee that takes longer to heat.
Roast Metric / Initial Reference point:
It acts as the " Initial Reference point" for the rest of the roast, influencing how quickly the coffee moves through subsequent phases like the Maillard reaction and first crack.
DRYING PHASE (PHASE 1)
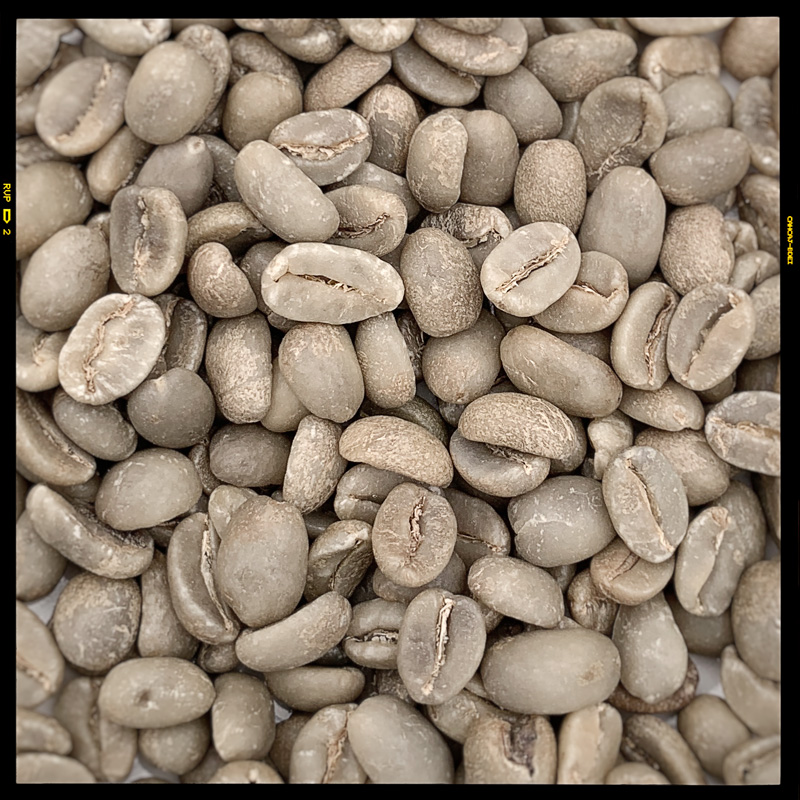
Time during which the beans begin as green and transform to yellow as they lose moisture. During this time, the initial heat of the roaster drives out moisture, preparing the beans for the chemical reactions ahead.
The end of the drying phase also known as "getting to yellow" which marks the end of the drying phase and is what sets up the roast for development.
Aromatic Cues: The raw grassy or plant-like smell gives way to a smell of toasted bread or hay as the roast progresses.
MAILLARD (BROWNING) PHASE (PHASE 2):Browning: The Maillard reaction occurs, where sugars and amino acids react to create melanoidins, which give the beans their brown colour and contribute to flavour.
Aromatic Cues: Sweet & Caramel Notes; Aroma compounds begin to form, developing smells of sweet, caramel, and cookie-like notes.
FIRST CRACK PHASE (PHASE 3):
Steam builds up pressure within the beans, causing them to expand and make a distinct cracking sound, this is know as 'First Crack'.
Chaff Shedding: The beans expand in size, and a layer of skin called chaff is shed.
Flavour Development: Crucial flavour compounds are developed, and the aroma becomes deeper and more pungent.
DEVELOPMENT PHASE (PHASE 4):
This is one of the most important times as we are now developing the roasted coffee to our desired roast profile.
We are now observing the colour of the roast from this point to the end of the roast where we drop our roasted coffee from the roaster. A key metric is the Development Ratio (DTR), a calculated percentage of the 'Development Time' (time from First Crack) divided by the Total Roast Time, with ideal figures around the 18% to 25% range.
Over the course of the past year (2025), I have dedicated significant time to this project, steadily increasing my roasting activities using the 100N Mini Roaster. This hands-on learning experience and the results this roaster is producing, has been immensely enjoyable, allowing me to continually develop my roasting skills and work towards mastering the unique characteristics of this machine.
While this little roaster has served as an excellent learning tool, its capacity remains a notable limitation. With a maximum batch size of 120g (though I have pushed it to 150g), it quickly becomes inefficient when attempting to scale up production to accommodate the needs of family and friends. This constraint has highlighted the need for a larger, more capable setup as my roasting ambitions grow.
Currently, we are investing in commercial property with the hope that, in the future, we will be able to establish a dedicated space equipped with a small roaster, ideally with a capacity of around 1kg. This would allow for increased production and greater consistency, supporting our passion for coffee roasting as it continues to evolve.
Among the available options, the Aillio Bullet stands out as one of the best small-capacity roasters on the market, thanks to its compact size and impressive features. With the release of Revision 2, which is expected to receive certification and become available in 2026, we see this as the logical next investment. Upgrading to the Allio Bullet will be a significant step forward in our roasting journey, enabling us to further refine our craft and meet growing demand.
Acknowledgement and Gratitude. . .
My journey into coffee roasting would not be complete without recognising the significant individuals who have inspired me along the way. Over the past 15 years, my appreciation for exceptional coffee has been shaped in large part by the influence of those who have shared their expertise and passion with me.
Through their ownership of Sibonis Coffee in Pymble, Dean and Rose Kiner have consistently set a high standard for coffee excellence. Their pride in their house blend, 'Romeo', has established a benchmark by which I measure all other coffee experiences. The quality and consistency of this blend have left a lasting impression, guiding my own approach to roasting and coffee appreciation.
I extend my heartfelt thanks and gratitude to Dean and Rose Kiner for their unwavering support and the inspiration they have provided throughout my journey in coffee. Their dedication and encouragement have played a pivotal role in shaping my passion and commitment to the craft of coffee roasting.
- Flavio Spedalieri -
Written: 28 September 2025
This Document Complies to W3C
XHTML 1.0 Strict Standards

